Joel Whitaker shows how to securely sync data from an external CMS source to Webflow. This implementation uses Baserow and Middlelink.
UK based developer Joel Whitaker (@0xJJW) was an Android developer before discovering Webflow and no-code. He’s interested in introducing standard software development processes to the no-code space. Early in the stream, Joel discussed how no-code developers use webhooks to fill gaps where traditional software developers may instead rely on APIs. From there, Joel explained how to use Baserow as an external CMS and connect it to Webflow with the use of Middlelink to keep API keys secure.
This video is for Webflow developers interested in pulling data securely from a third party source without exposing API keys on the URL string.
While this example did not show how to gate content, it could be adapted to use a membership solution like Memberstack or Outseta.
A knowledge of JavaScript is not required for this implementation. Anyone with JavaScript skills could extend the capabilities shown by writing custom code.
Please keep in mind that the data displayed using this approach has search engine optimization (SEO) implications and will not be indexed by Google.
You will need the following accounts:
It’s not uncommon to have data in one tool — like a relational database — and wish to have it displayed on a website. A typical approach is to use nocode automation tools — think Make, Zapier, or Airtable scripts — to move data from one place to another. Another approach is to use a third party tool designed to sync the data.
Another approach is to pull data directly from the original data source at the time it is needed for display on a webpage. This eliminates headaches from keeping multiple data sources in sync with one another.
In this example, our primary data source will be Baserow. Information will be sent to a page on our Webflow site at the exact moment it’s requested, without storing the data in a Webflow Collection. This eliminates the need for learning how to sync multi-reference fields and images (or anything else!), which can be a stumbling block for those learning no-code. We’ll also be building out a workflow using Middlelink to create an endpoint that we’ll incorporate into our Webflow page so that our API keys are not publicly visible.
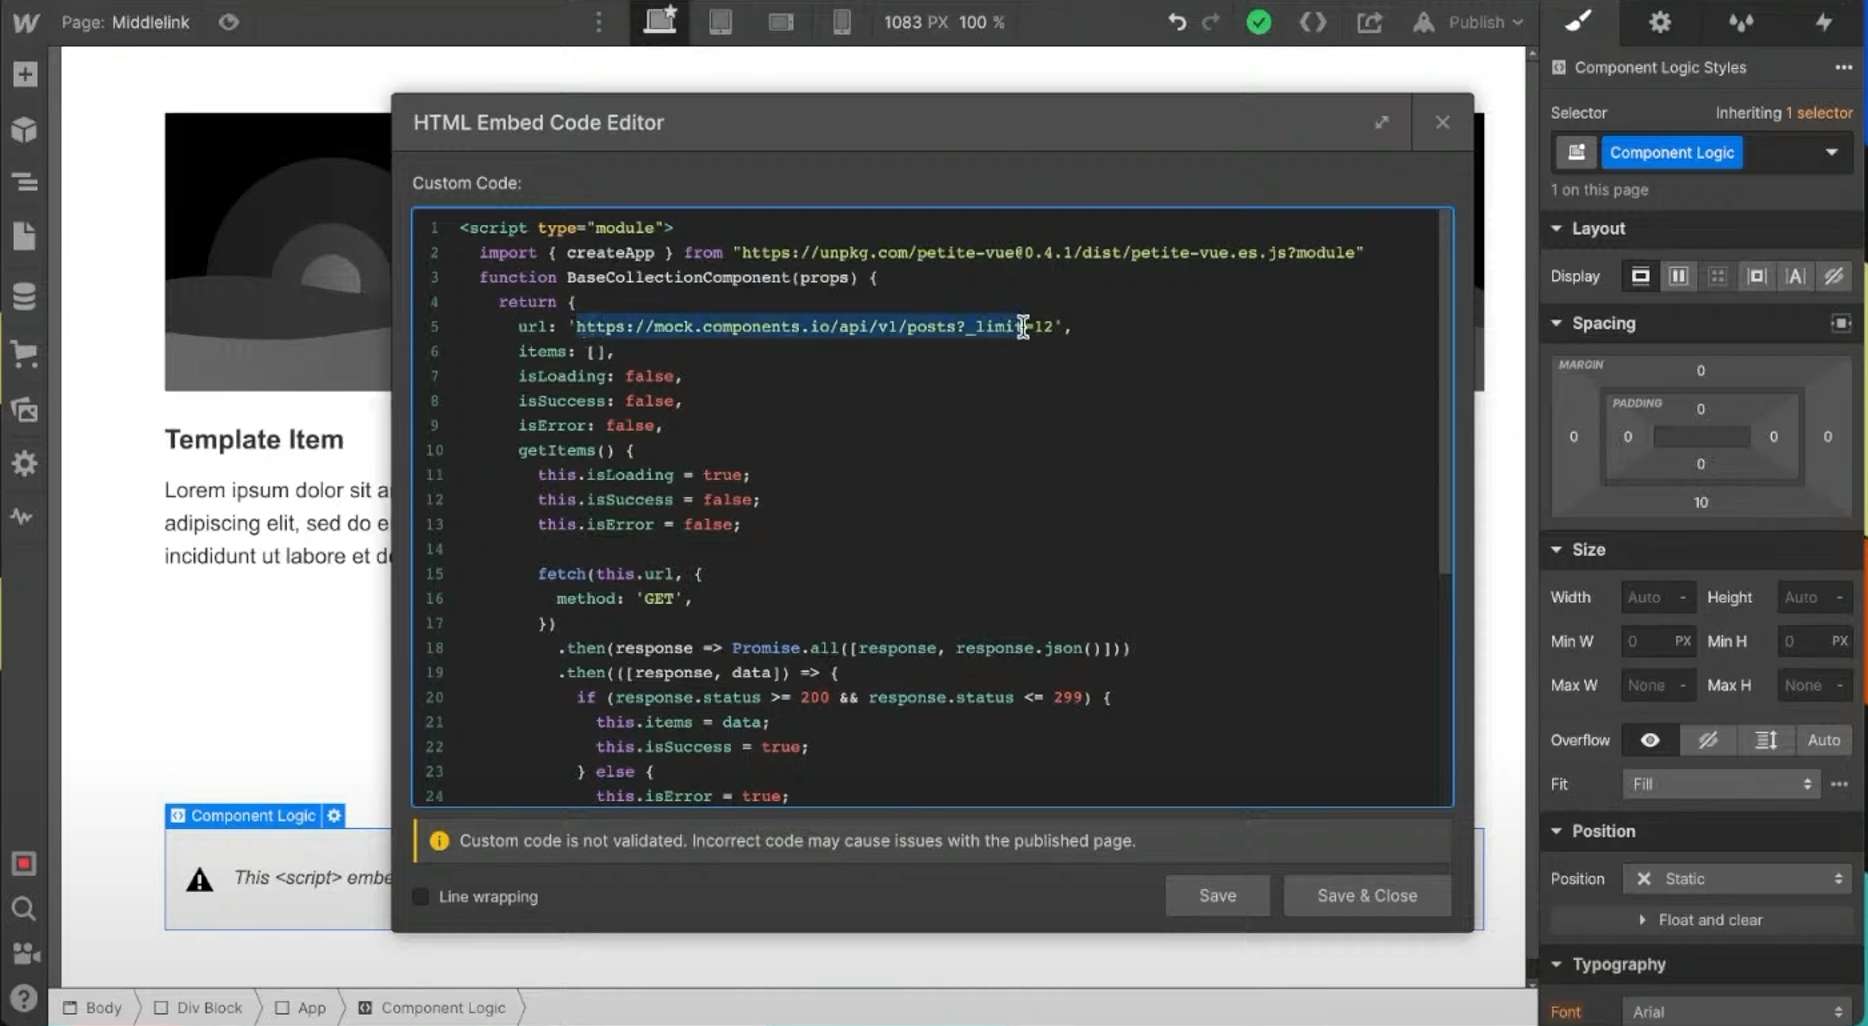
We’ll start by creating a page in Webflow that contains a div with a bit of padding. Next, using the Components.io Chrome extension, we’ll select a pre-made component. The components are flexible enough that styling can be changed to suit your needs. The elements on the page in the designer are static. However, our goal is to populate the template with live data from Baserow (or any other external DB). That's where the snippet of code that is automatically added comes into play. This will fetch our live data from our external DB and update the different components with our DB's information.
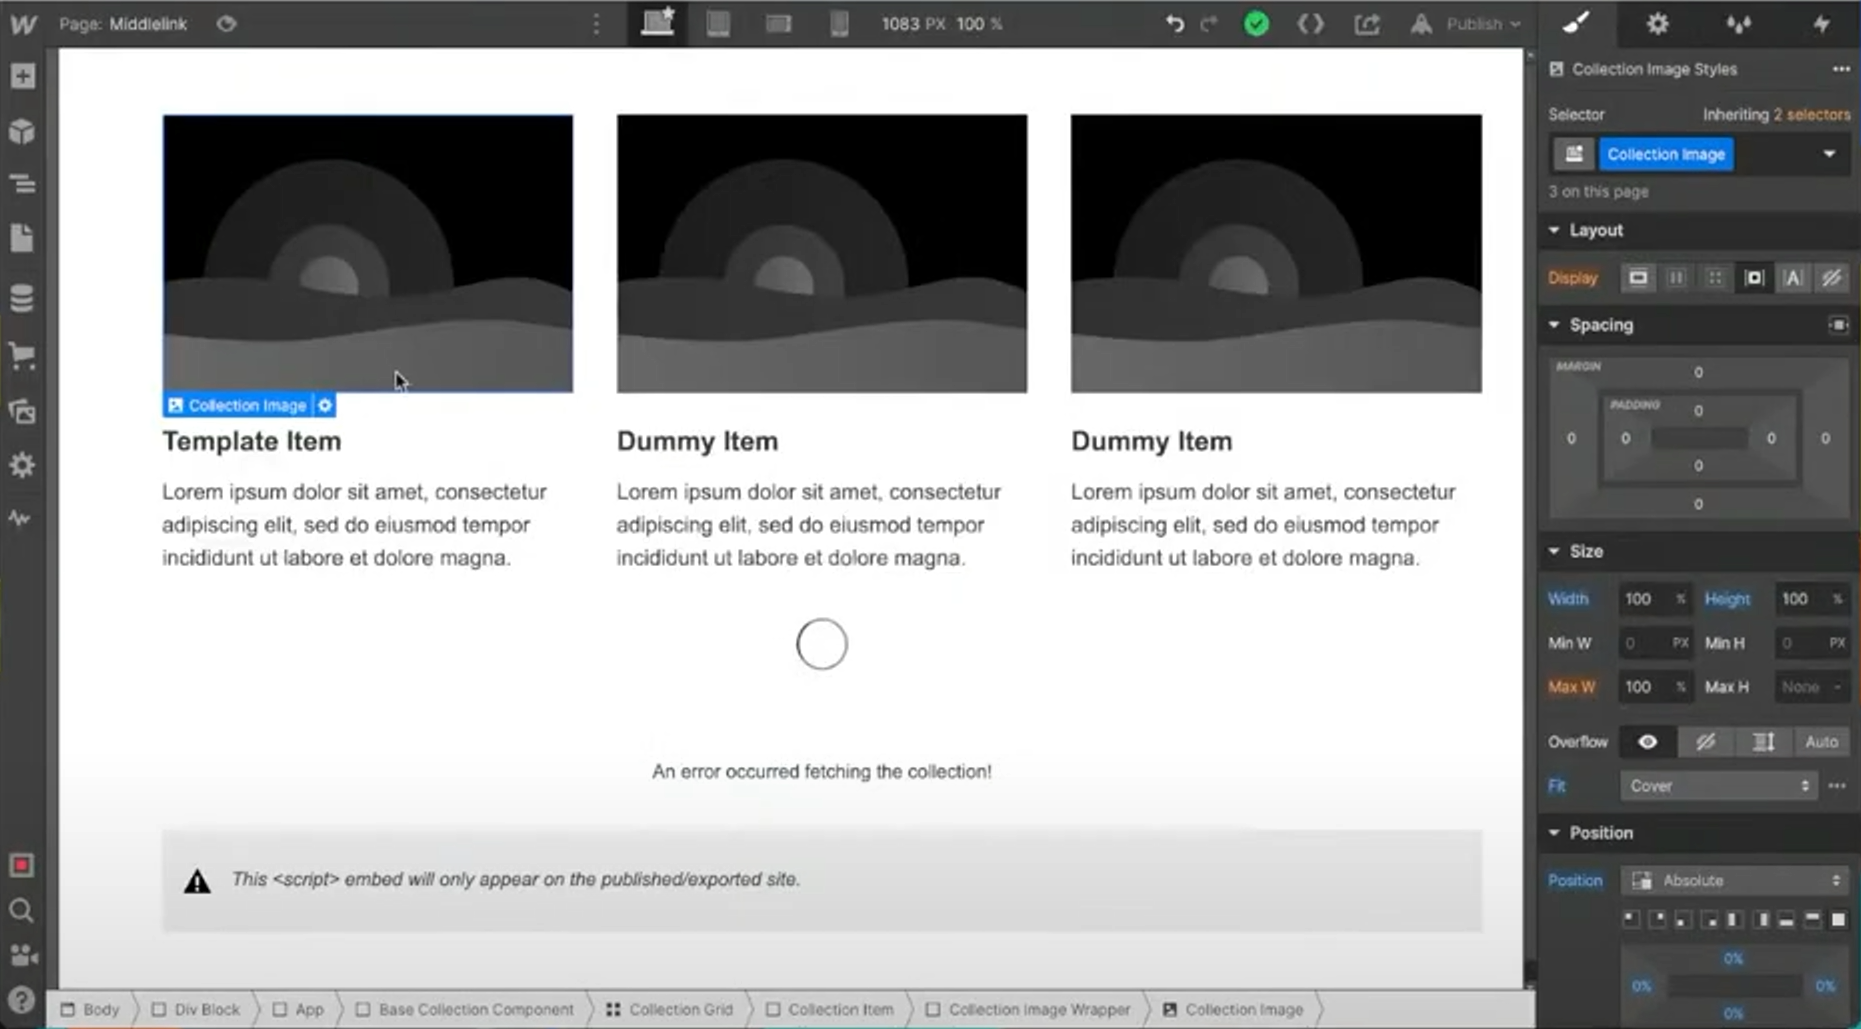
With these initial steps finished, publish the page to see the design using mock data.
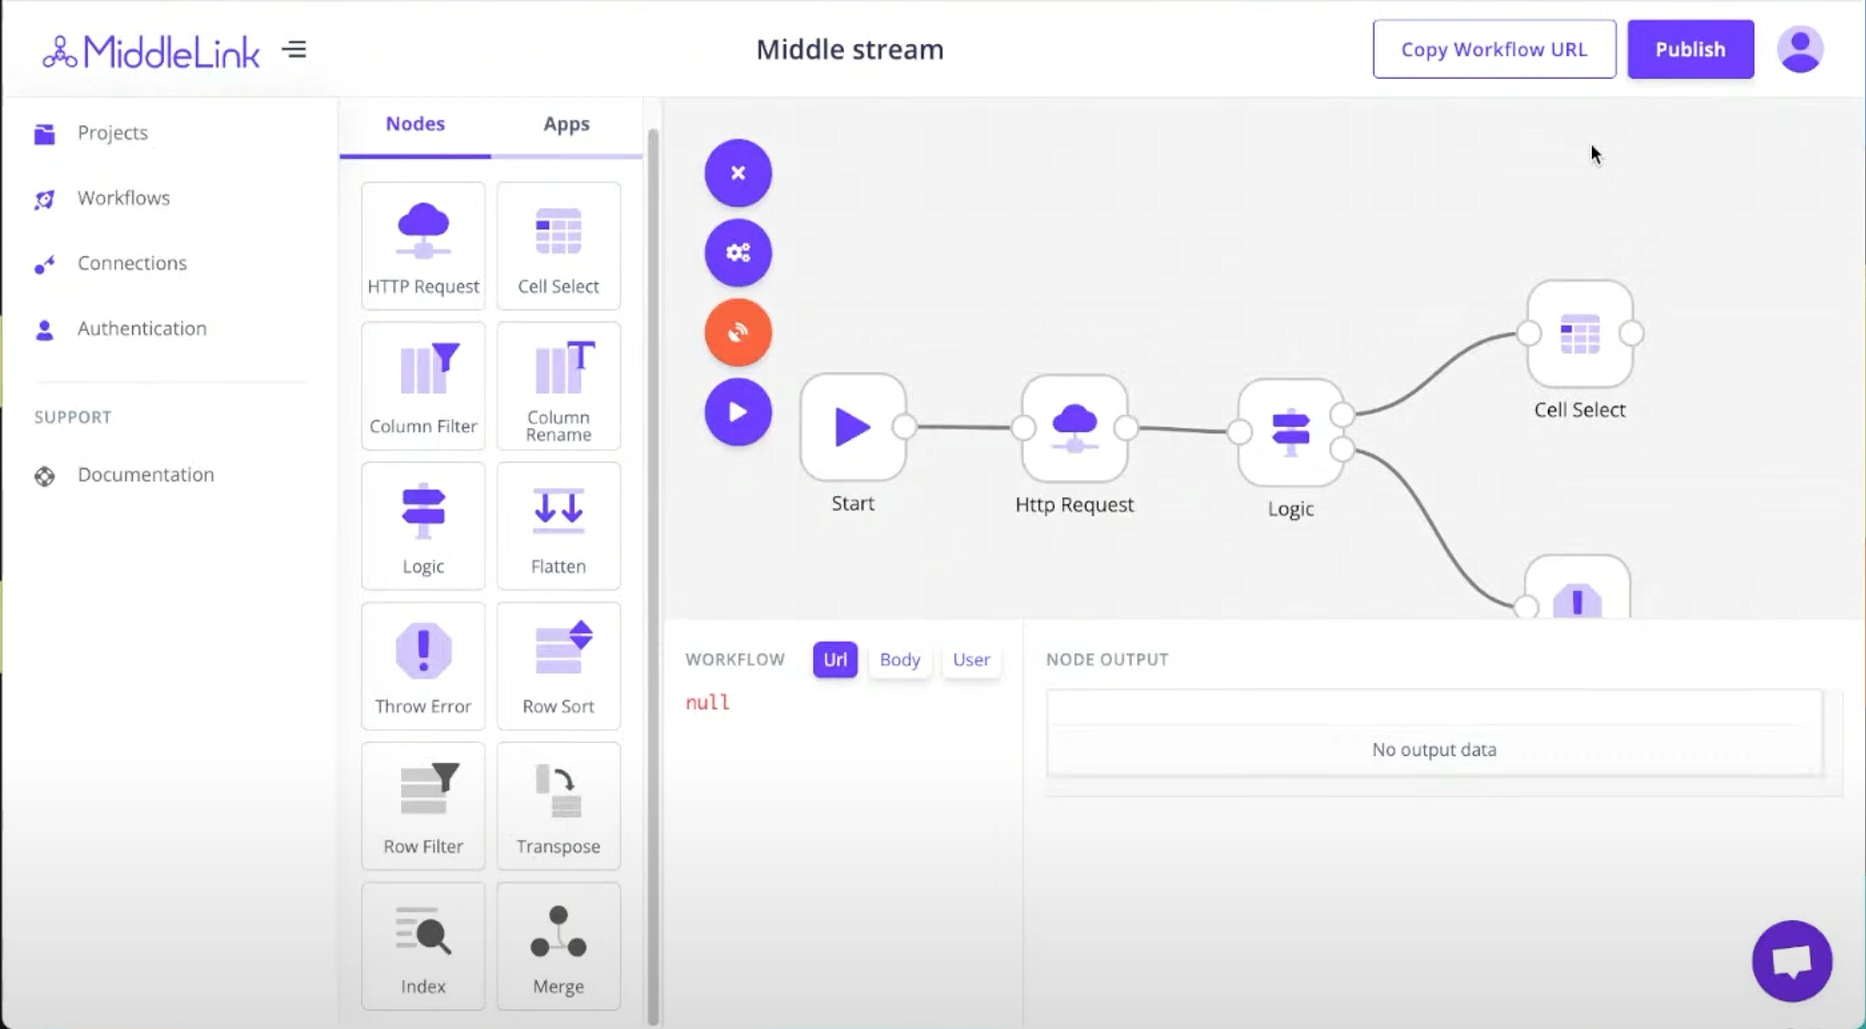
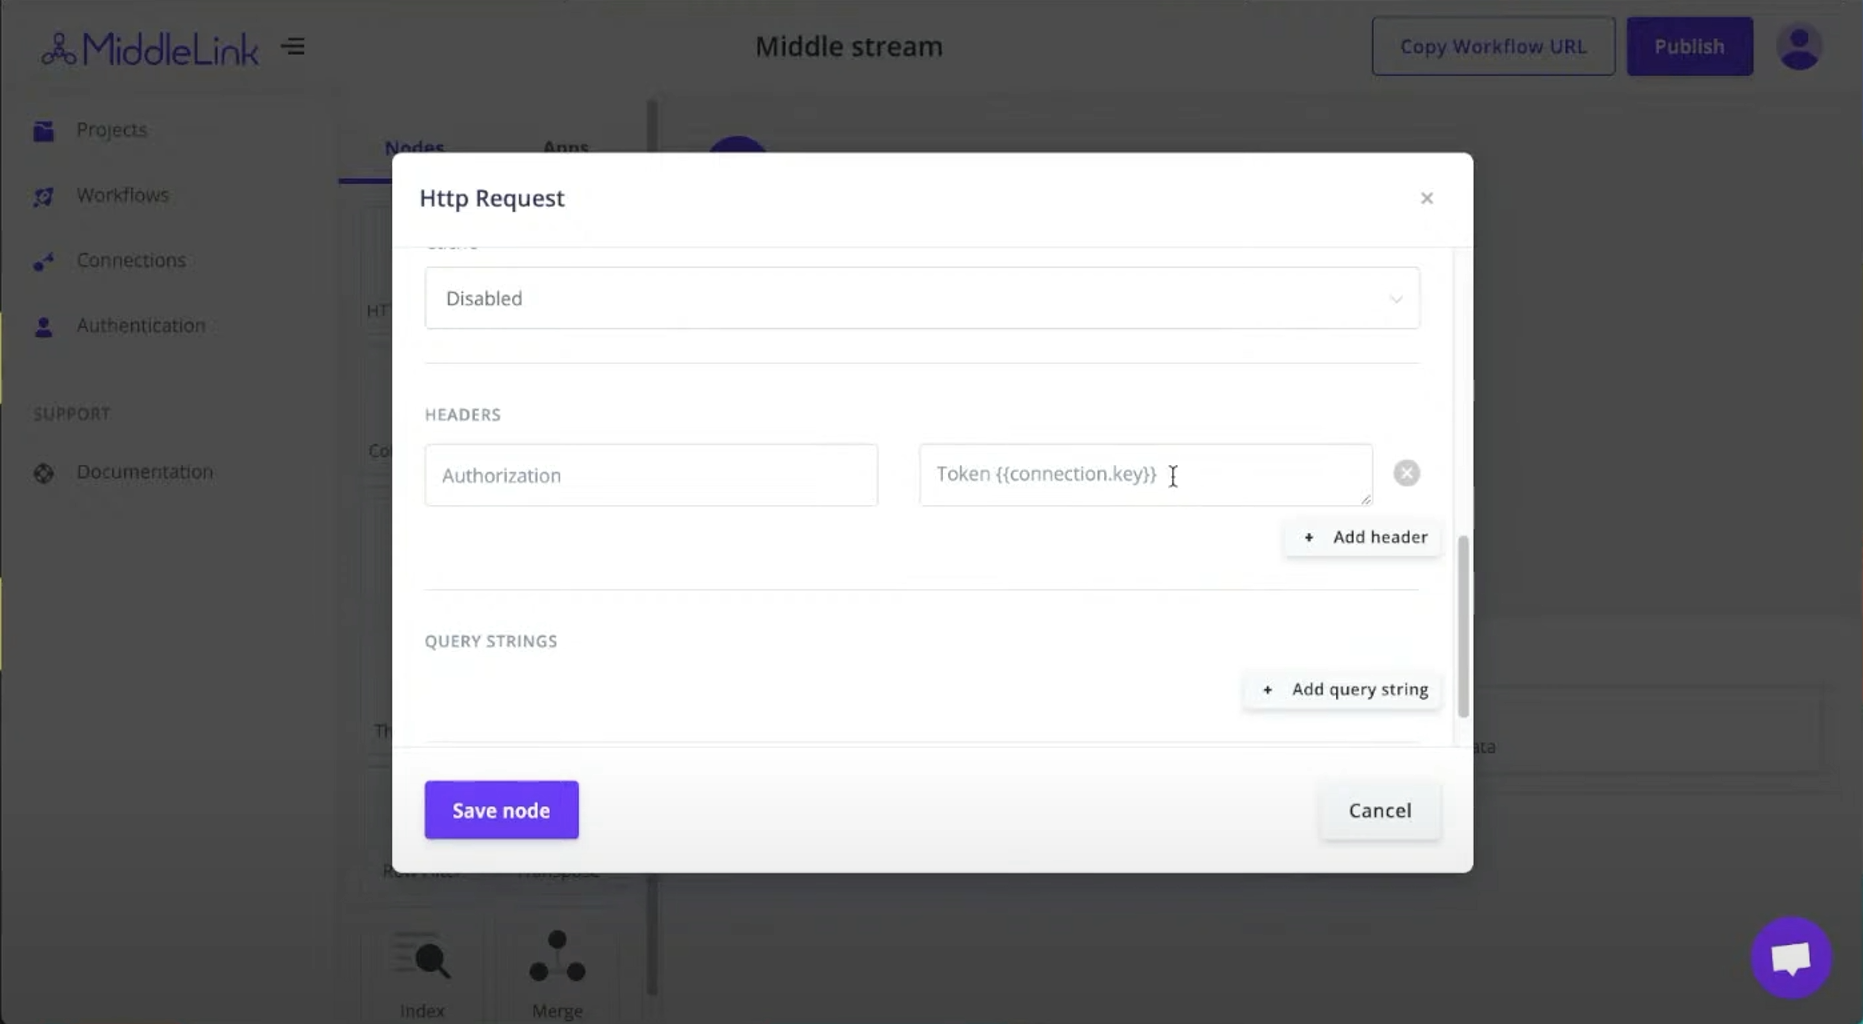
In order to adjust the code snippet with our own data, we need to generate a URL that returns the information we want to display on the page. We could call our Baserow table direclty but that would expose our API key. With middlelink, we can create a workflow that generates a URL returning the data in the format required to be displayed in Webflow without exposing our API key. Setting up a workflow in Middlelink is similar to creating flows in other popular automation tools. Nodes are dropped onto a canvas and connected to one another.
For this use case, the nodes are:

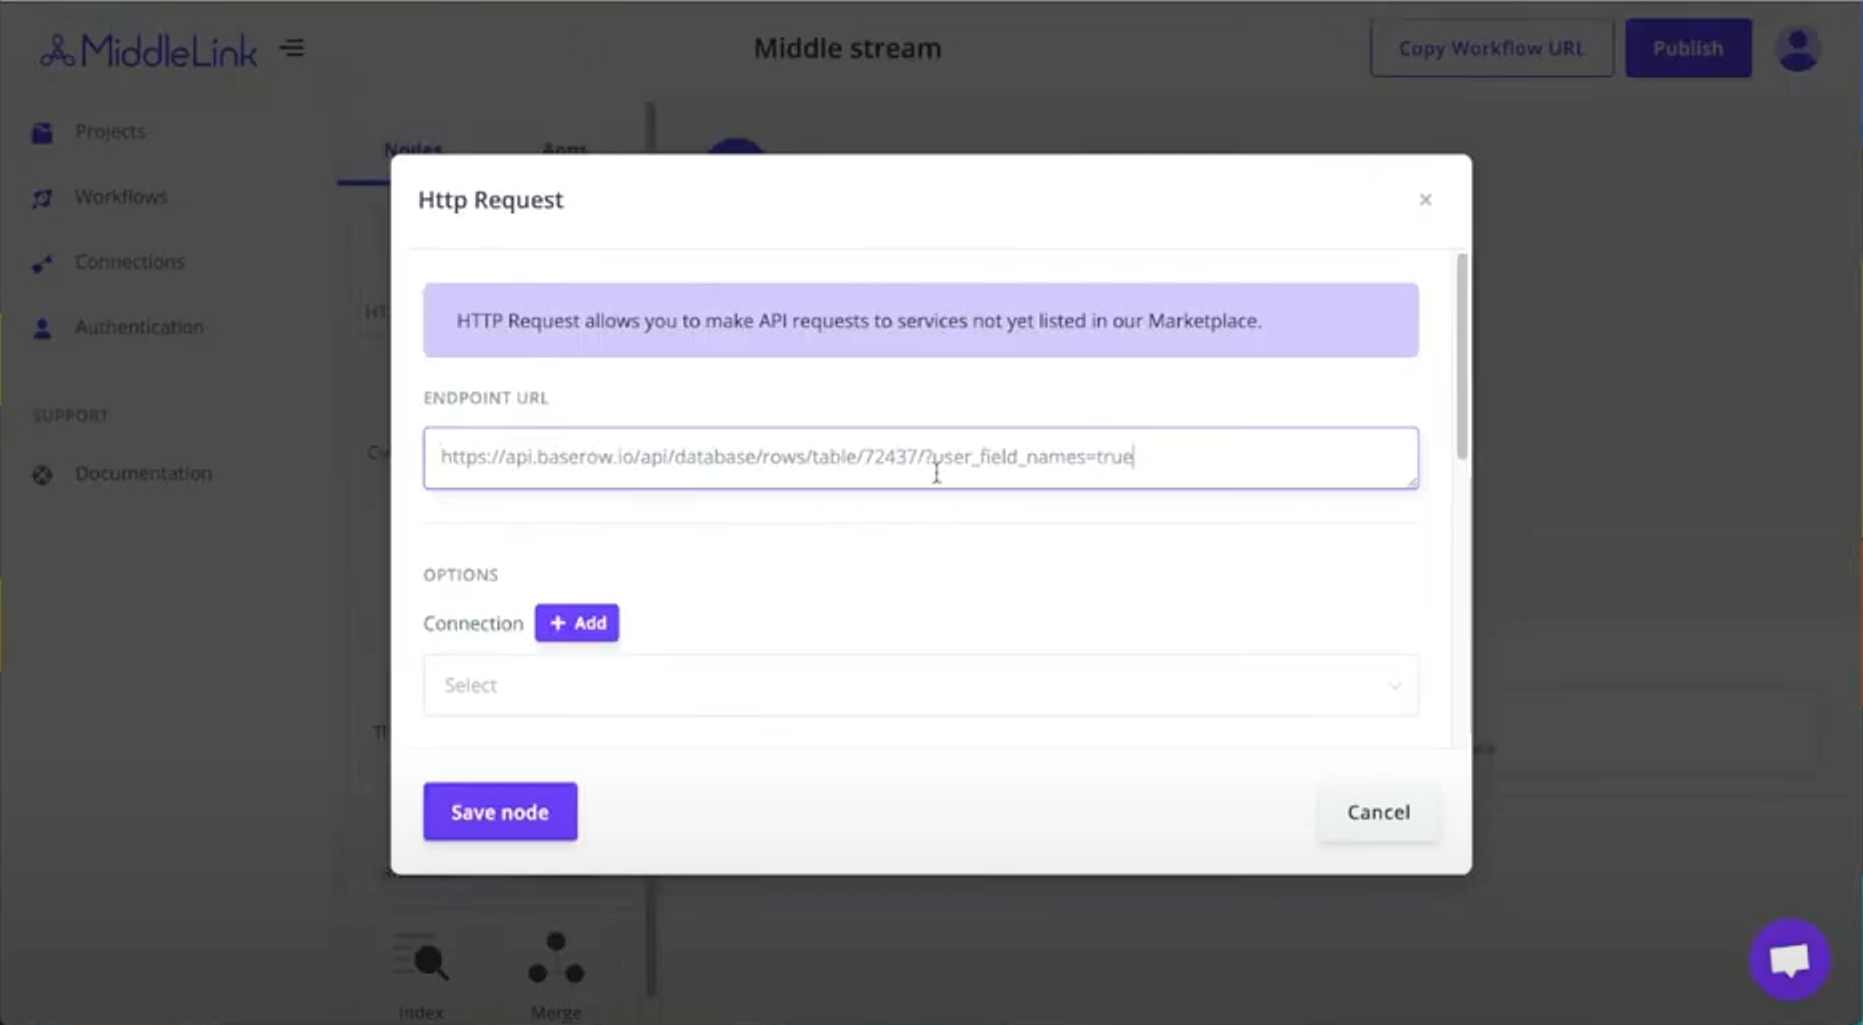
TIP: Add query parameters to add sorting or other controls to the data.
The next step is to add a logic node to check that the API request was successful. (A successful request could return an empty list/ object depending on the filters applied.)
TIP: Execute each node as you add them to the page so that there is data available for testing.
After adding the logic node, place a cell select node to the canvas so that we can more readily work with the data arrays.
With the workflow configured, the final step is to publish it so that there is a URL that can be added to our Webflow page.
Add the link from Step 2 into Webflow and then publish the page to see data being pulled from Baserow instead of the mock data source as seen in Step 1.
With the basic structure in place, one can now start adding new fields in Baserow and updating the Webflow page to display the new items. This can all be done without modifying the existing Middlelink workflow or having to republish the Webflow website! Any updates in Baserow are automatically reflected in your Webflow site after refreshing the page.


