You can add thousands of pages to your no-code site but how can users effectively find what they need? Chuck Meyer teaches us how to add autocomplete search to any site using Algolia.
You may have used Algolia and not have realized it. Their services power search results ranging from developer documentation to ecommerce to content sites like this one and more.
So -- what exactly is Algolia? Algolia provides a set of hosted APIs that allow developers to build search and discovery experiences into websites and web applications. In this livestream, Chuck Meyer (@chuckm) Sr. Developer Advocate at Algolia, helped me add Algolia search to the Automate All the Things website.
If you have a content-dense site, follow this livestream to learn how to add lightening fast search and filtering to your Webflow site. Adding search may seem intimidating at first, but this stream offers resources and inspiration to get started.
Since Algolia is a managed service, the first step is to share your existing content with Algolia so that it can be indexed. Once that’s done, the second step is to add search — in this case “Instant Search” — to a website using an Algolia library. You will also learn how to add auto complete via a Javascript library.
Tip: On the stream, I often talk of databases. Algolia doesn't use the term. Data is maintained in an index.
You’ll need accounts with the following services:
A copy of the code snippet used is also available.
With Algolia, we will be building an index to support rapid text search. Before sending data to Algolia, start by thinking about what information a person may be searching for on a site.
To help decide what to send, ask:
Tip: While it may be tempting to send all your data to Algolia, don’t. Send just enough information so that a website visitor will be successful with their search. Also remember to not send data that should not be publicly visible or accessible.
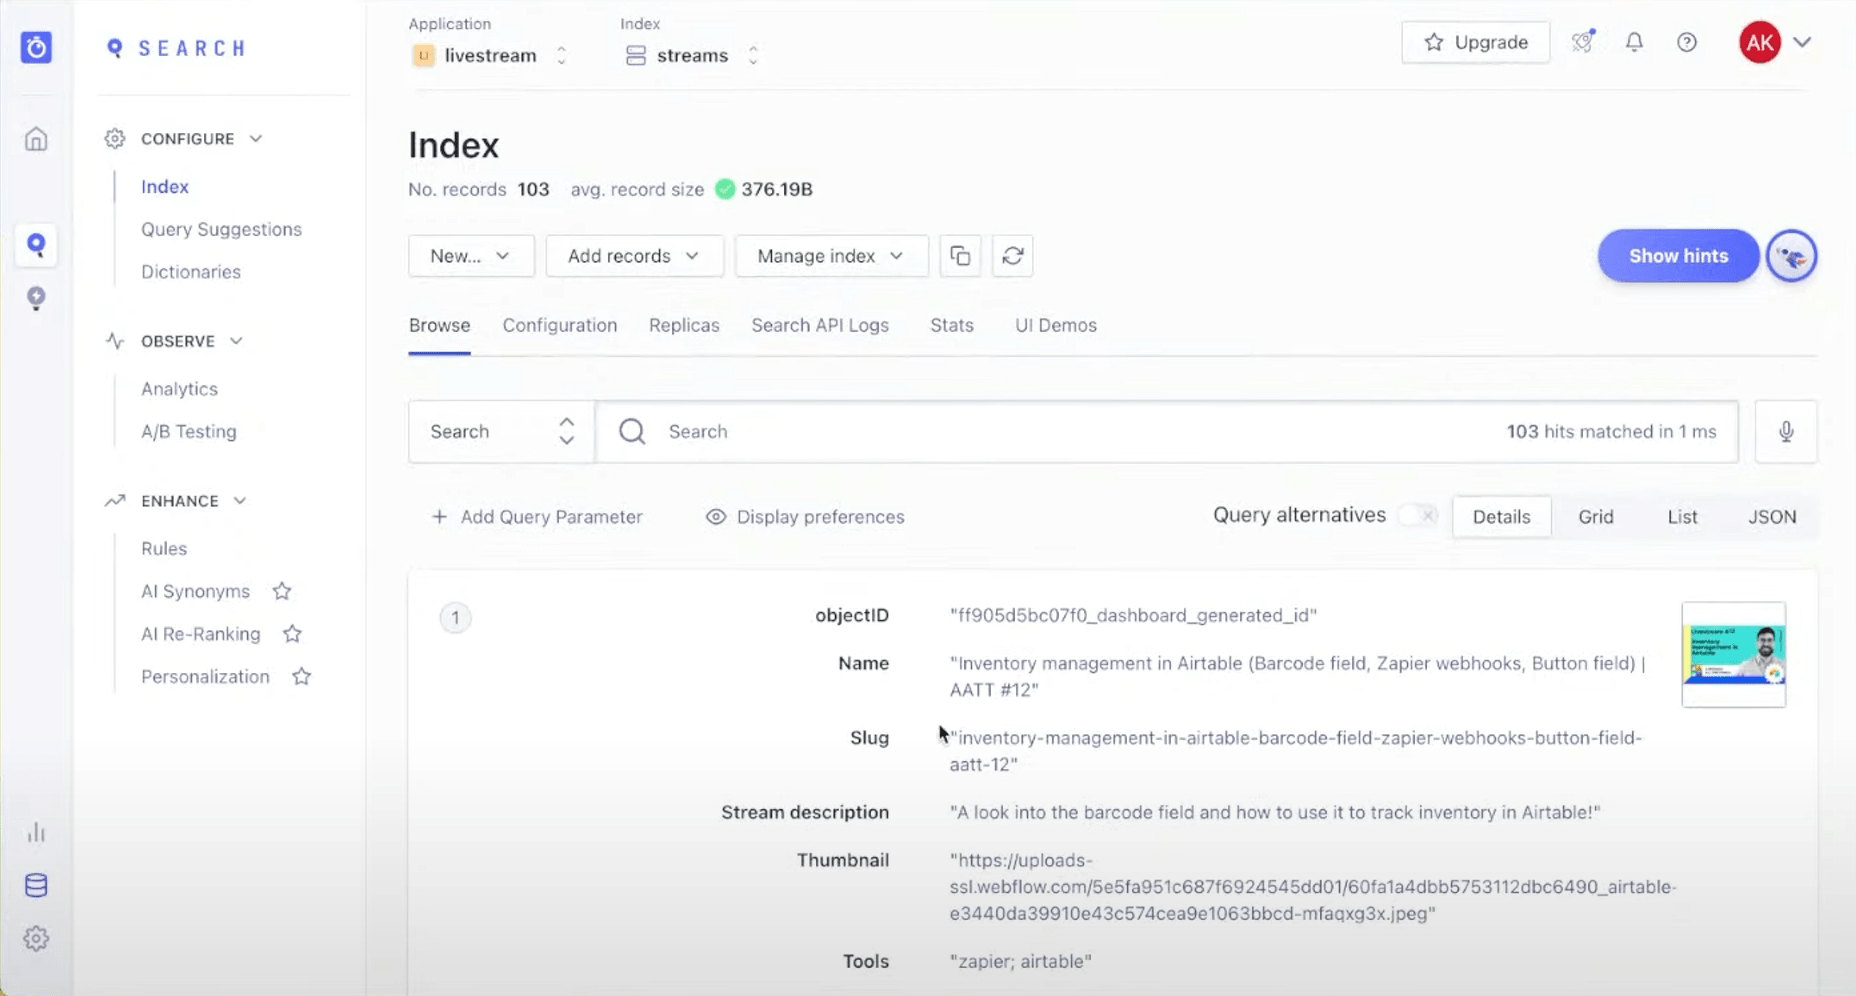
For the purposes of this stream, post name, slug, stream description, thumbnails and tools were selected.
Tip: Share a unique identifier with Algolia to be used as an object ID. This creates a one-to-one mapping between your original source and Algolia.
There are two ways to send data to Algolia: via an API or by uploading a CSV.
You’ll need to create an application as part of sending data to Algolia. An application is the namespace that you will be working in and has a unique ID, so that you can work with multiple indices.
Tip: As part of creating an application, you have the option to choose a data storage geographic location.
Tip: When uploading data, flatten data as much as possible by having key-value pairs. Avoid nesting for faster indexing.
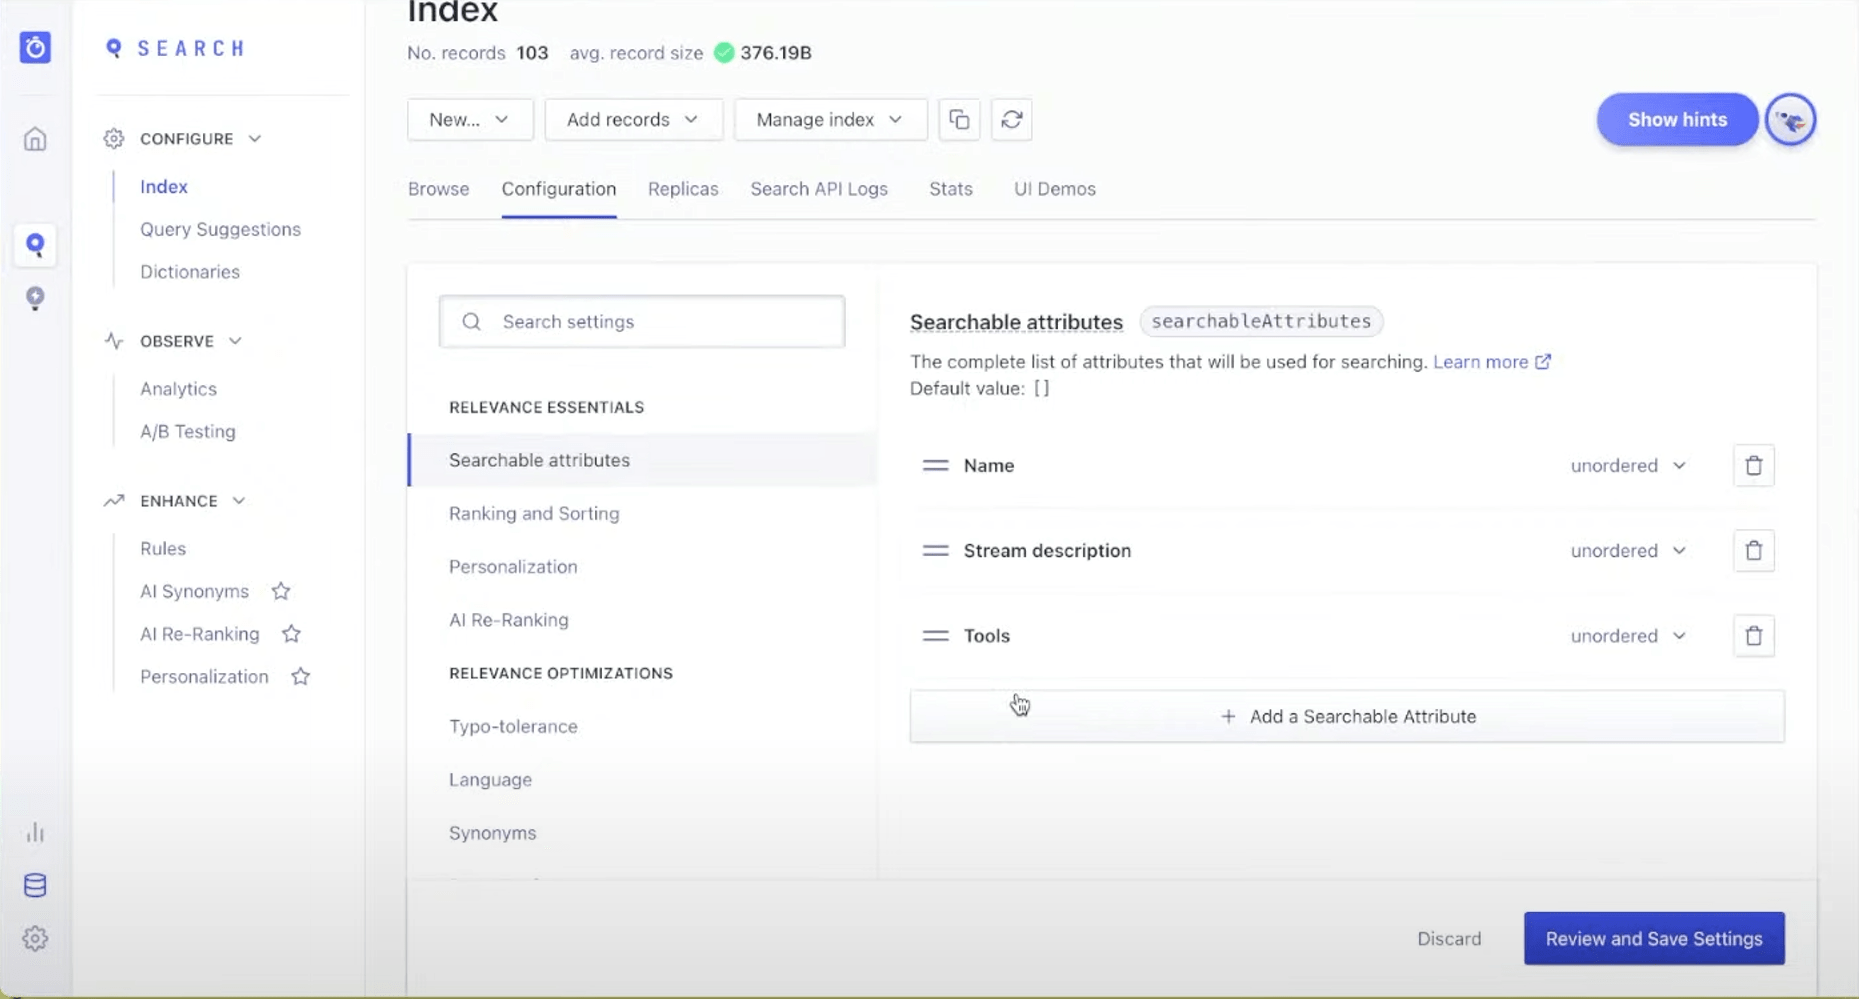
By default, Algolia will search against all the data that is imported. This can be changed. For this particular use case, we chose not to search against slug or thumbnail. We elected to include both values so that they would be part of the returned results seen by the user. For the purposes of time, we also did not dive into the more complex options, like custom ranking results.
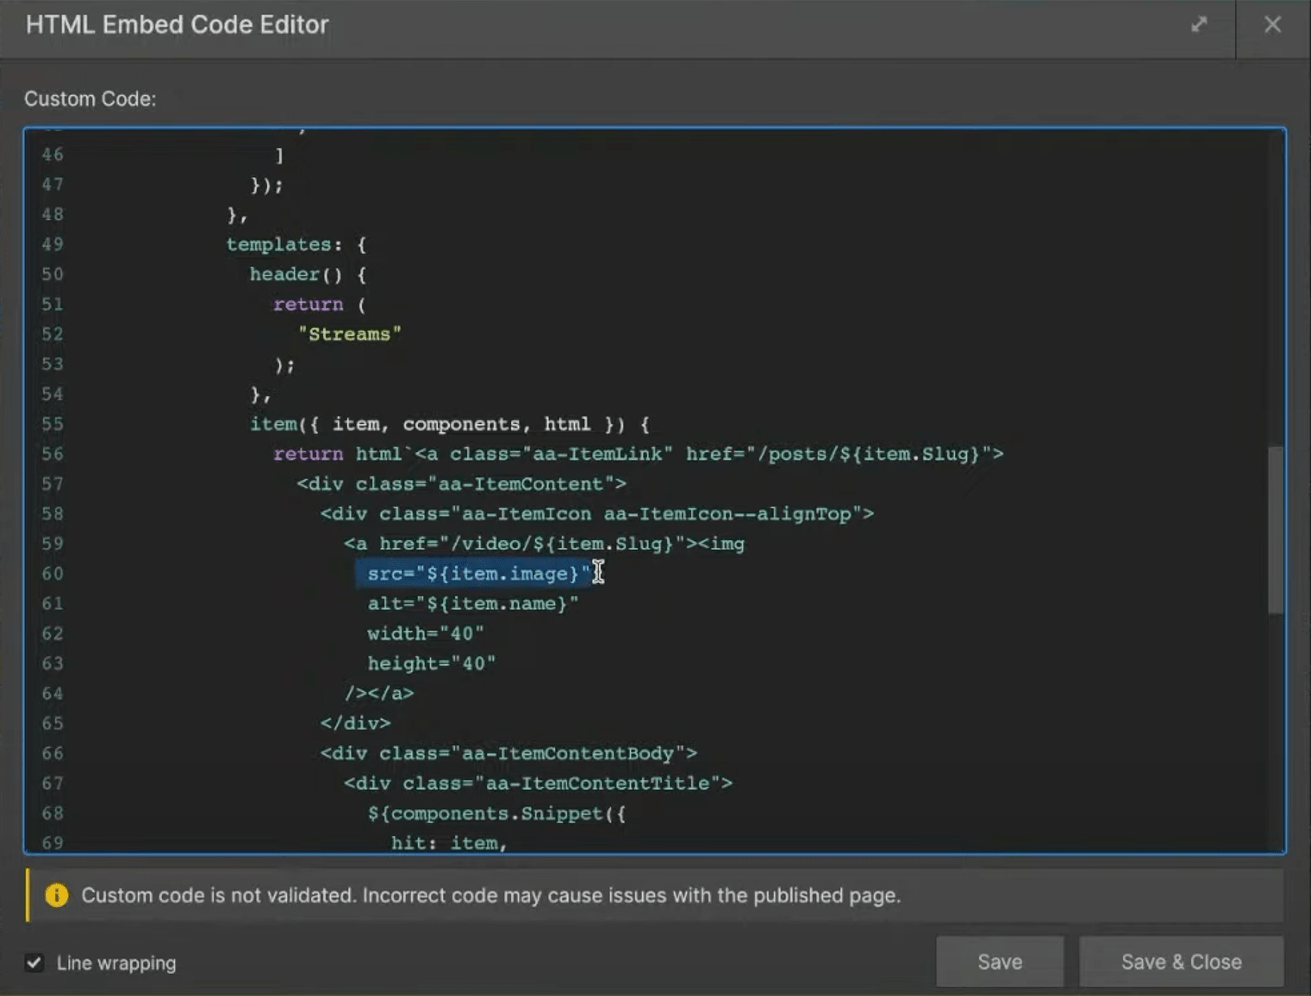
We placed a code snippet created by Chuck in an HTML embed. It was a mix of code and calls to a CDN. The snippet provided instructions for:

With the code in place, I walked through the code and updated it to use values for AATT instead of the test site Chuck initially created for prototyping purposes. This included making sure the div ID containing the search box was properly and consistently named in Webflow and in the code snippet. It also meant checking that the mapping of CMS fields from Webflow mapped to Algolia and to the code snippet. Time was also spent customizing how results would look on the site.
Once you’ve finished updating the code, the next step is to publish your Webflow site and test.
One approach to updating Algolia is to use a webhook to send data when an item changes in the source.
I then shared how I plan to update Algolia via Airtable.
Have you added search site to your site? How did you approach it?


