Ben Johnson shows how to use Retool to create an expense submission app and an expense approval app.
Retool Solutions Engineer Ben Johnson joined us on the stream to show me how to build two apps: one for submitting expenses and a second one for approving them. It was also a chance for me to dust off my SQL building skills.
Retool is a data agnostic nocode tool that helps you build internal tools. While Retool can be connected to a third party data source like Airtable, Johnson gave us an early look at Retool Database which enables storing data within Retool.
When working with Retool, there are three key concepts to understand:
For anyone interested in learning Retool, Johnson’s advice is to just start building.
Retool’s graphical user interface with drag-and-drop components is beginner-friendly.
Depending on what one is building, a minimal amount of SQL knowledge can be useful, making Retool a powerful tool for intermediate and advanced nocode builders and software developers who do not want to code internal applications from scratch.
To follow the featured workflow, you will need accounts on the following services:
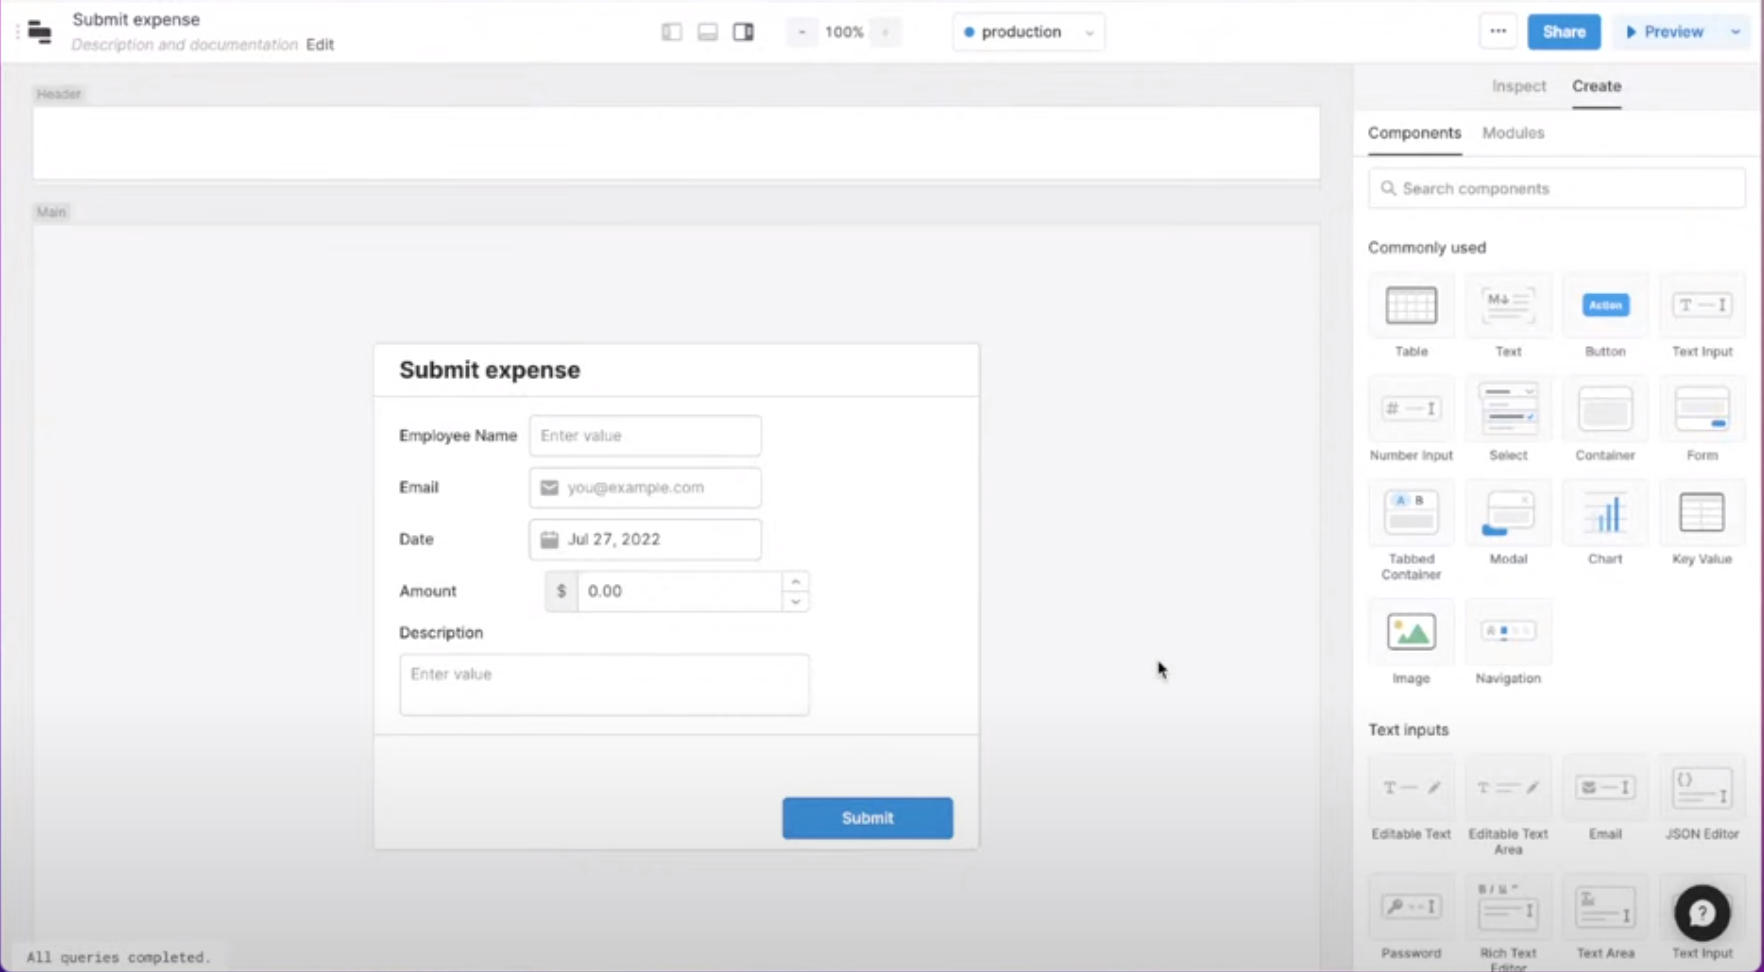
We started by adding components to a form and updating the form name to match our use case.
Our form for submitting employee expenses included the following fields:
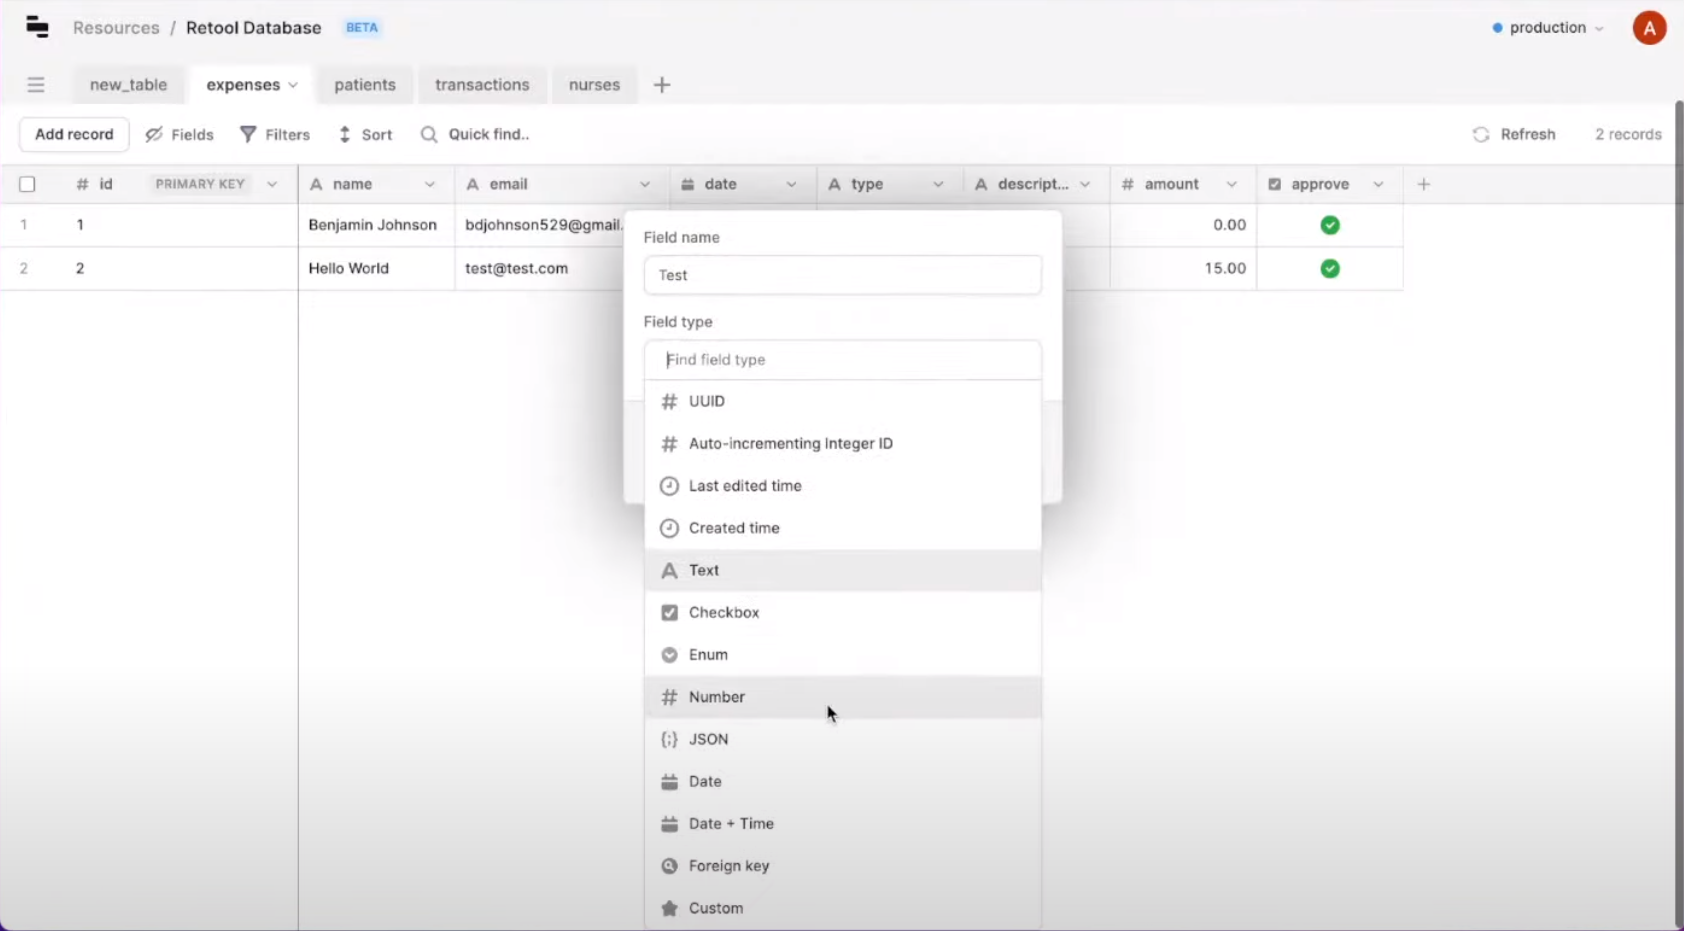
After opening a new browser tab, we went to “Resources” and selected “Retool Database” for our data source. For speed of development on the livestream, we used an existing “expenses” table.
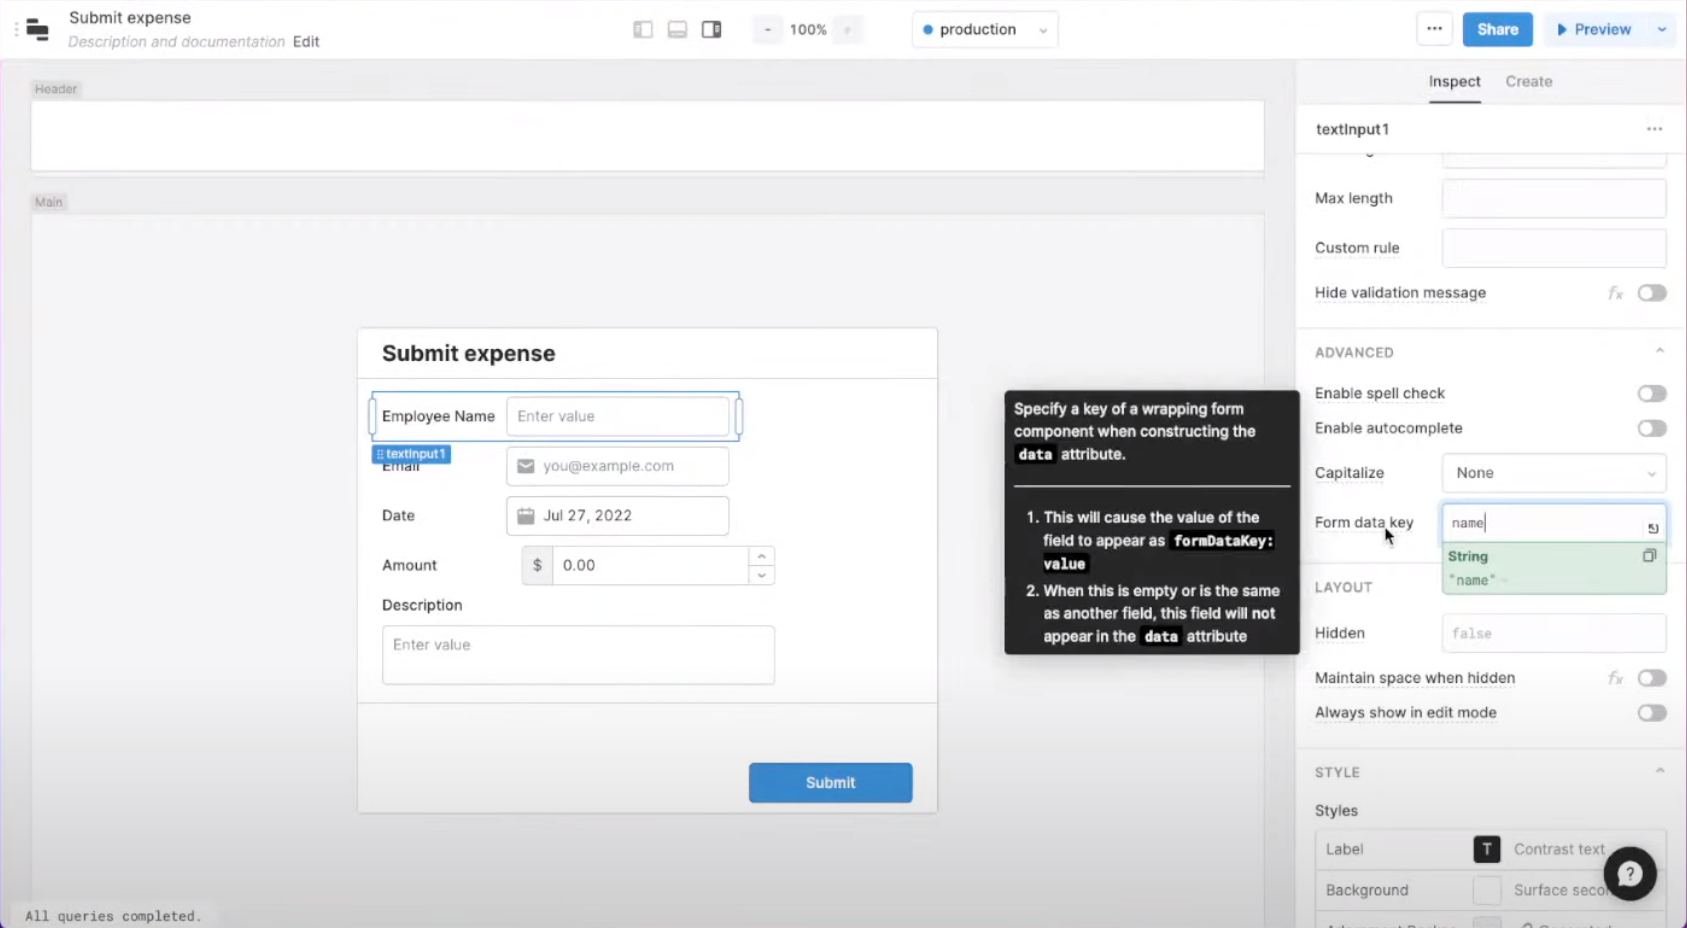
As the first step in connecting our expense form to our data store, we added our column names into the “form data key” field on our form.
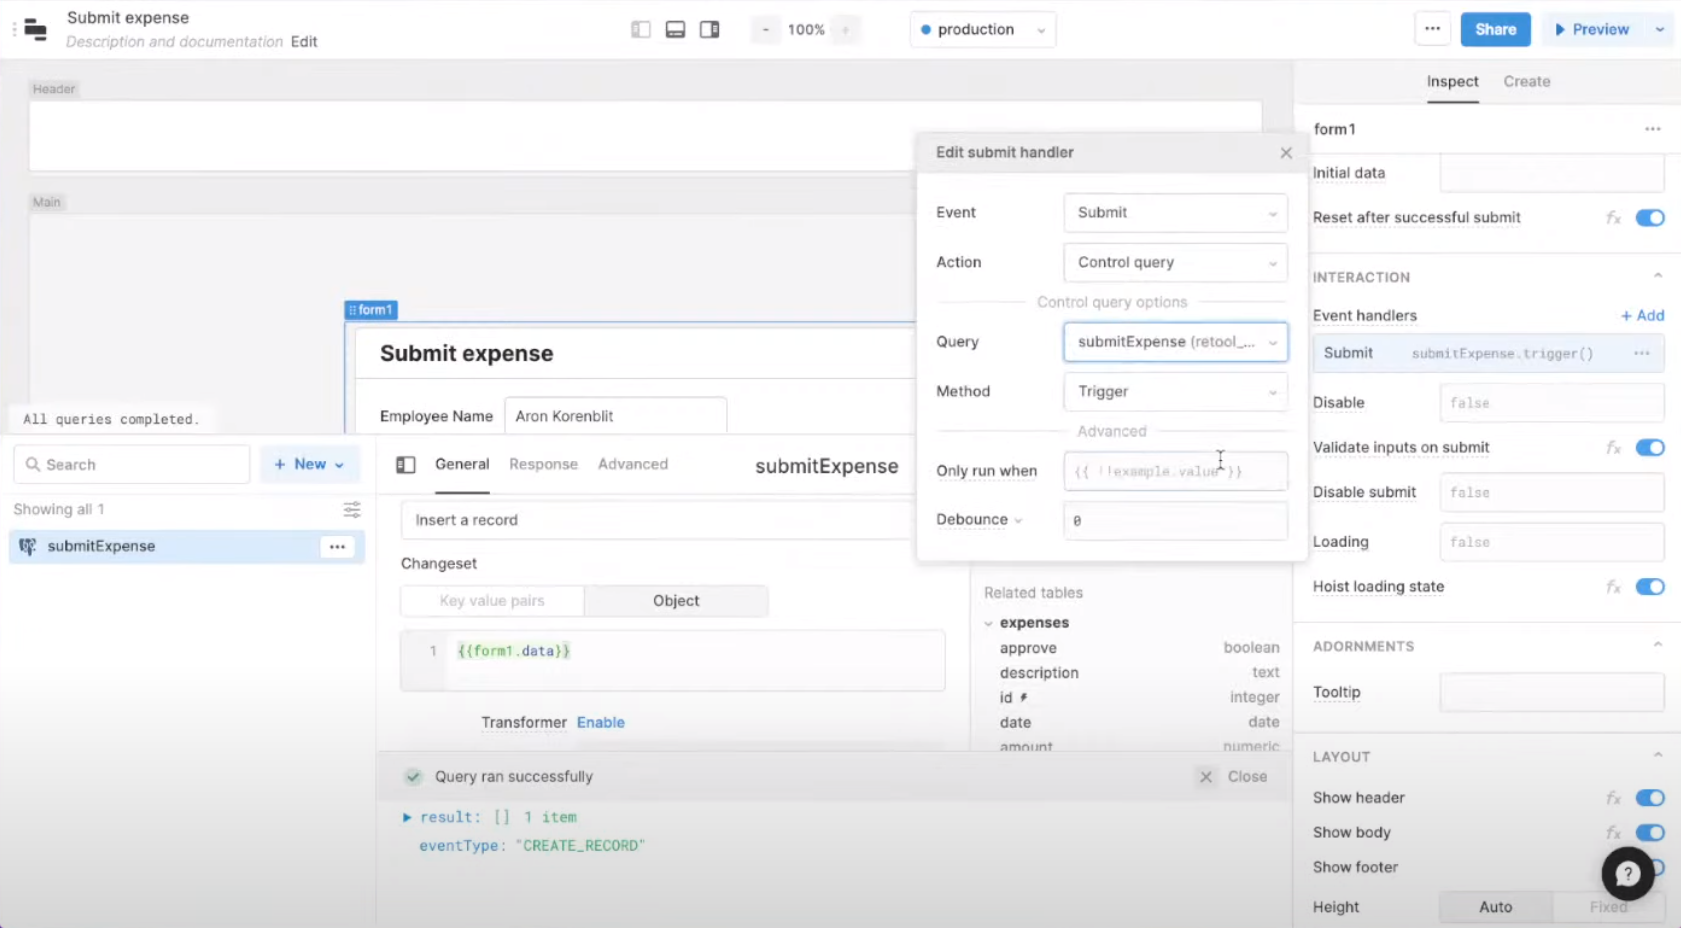
Entering column names as part of the meta information for each form field isn’t enough to fully connect the form with our database. We need to write a query to create a record in the data store and then associate that query with an interaction on the form. The internal Query Builder makes it possible.
While in the editor, we selected the “Retool Database” as the “data resource” and “GUI mode” to make writing queries easier than writing raw SQL statements.
We then selected the table, action, and mapped form fields to data sources using the “Object” option instead of mapping each individual form field to its respective field in the database.
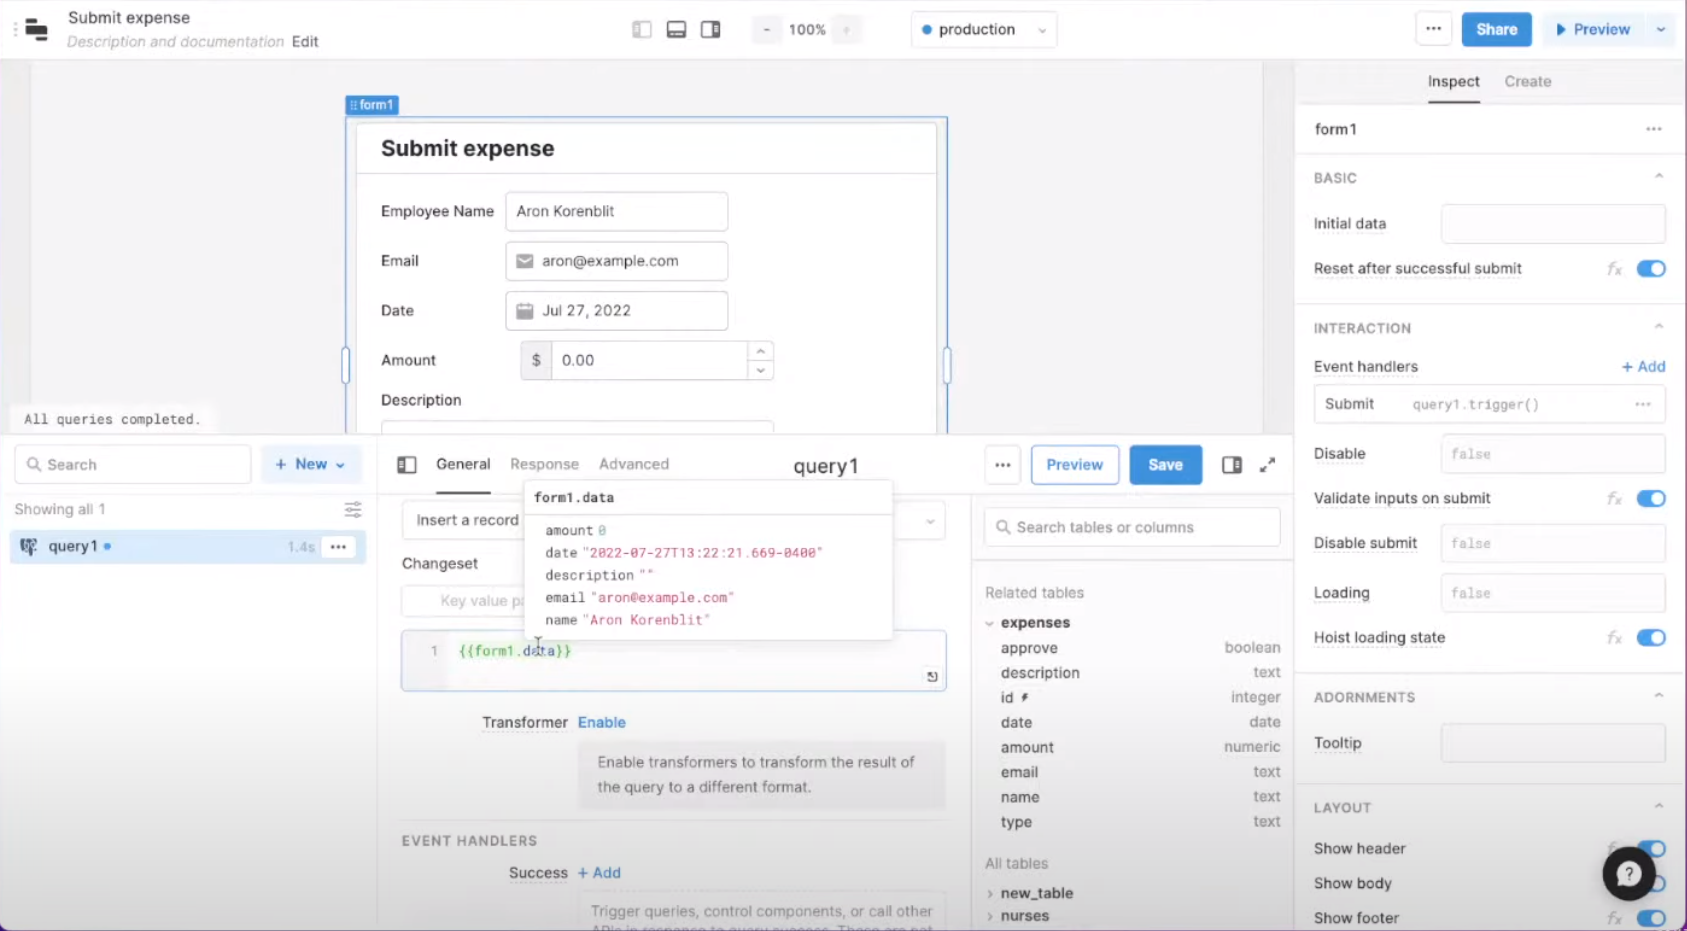
We then double-checked that the event handler was connected to the query. We also renamed the query to be meaningful and tested to make sure everything was working properly. Our first app — an app for submitting expenses — was now complete.
What good is an expense submitting app if there isn’t a way to approve expenses? It was now time to build our second app by returning to the main page when logged in and creating a new app.
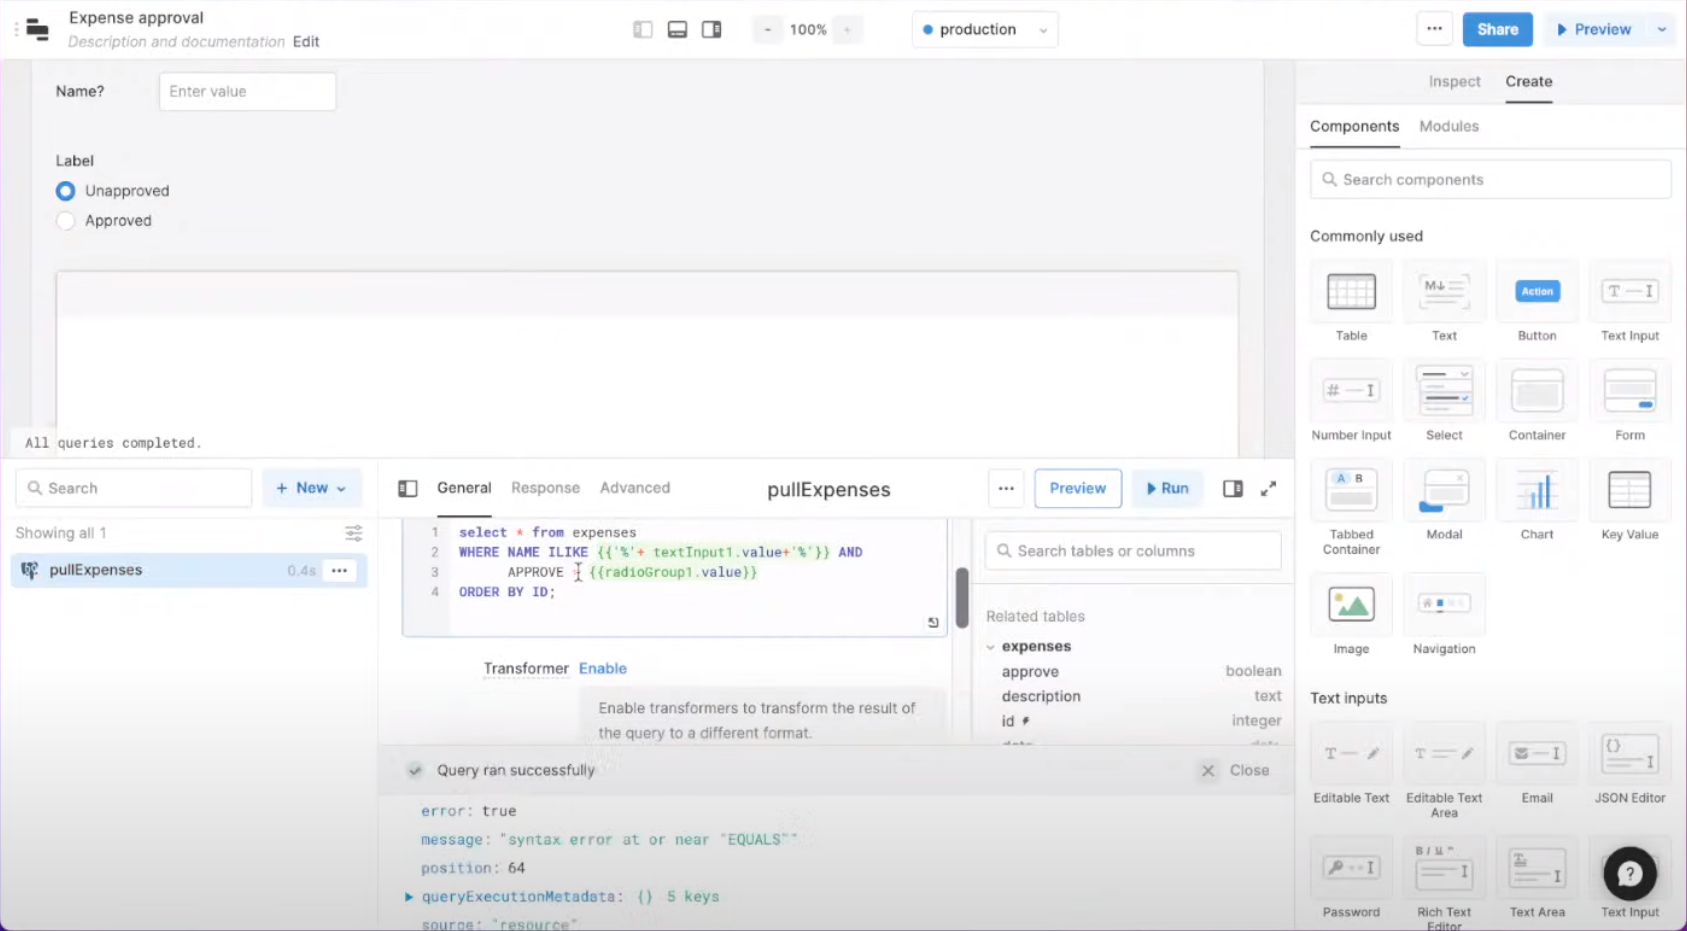
With the new app started, we replaced the fake data created by default with the existing data in our Data Store. To do that, we returned to the Query Builder. Instead of using the “GUI Mode” we did before, we elected to use “SQL mode” to write a new query that would retrieve records from our database.
Since we want to be able to filter records, we added a text input to the Canvas and a radio group to filter based on approval status.
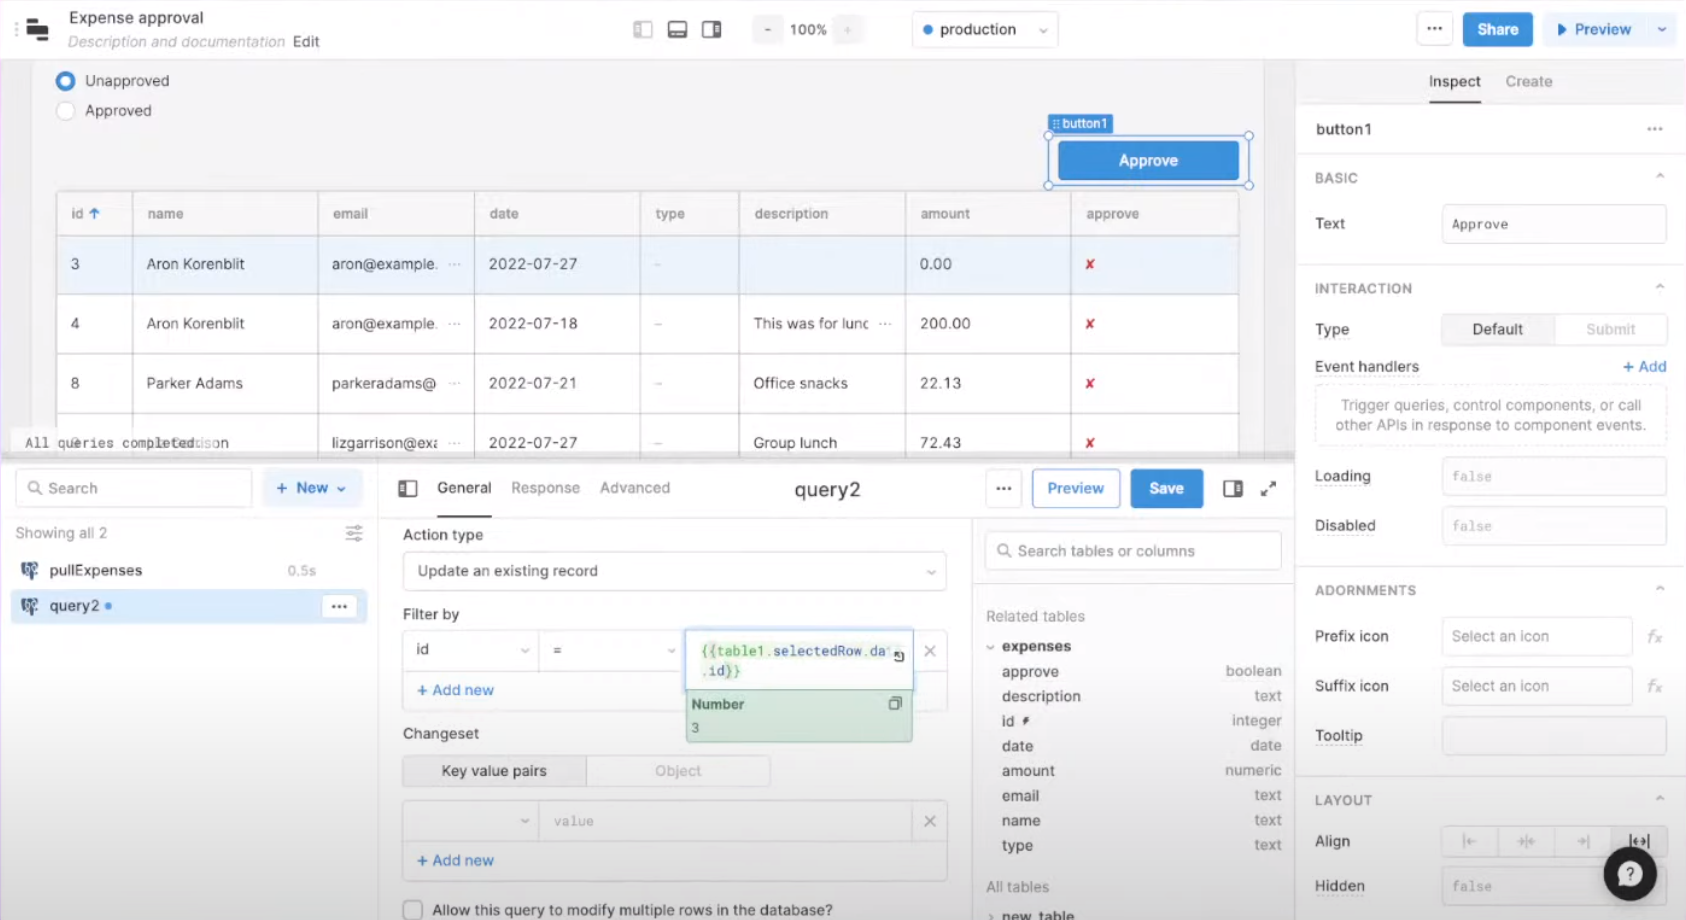
If you are a regular watcher of Automate All the Things, you know I am a fan of buttons. With the approval app in place, it was time to add a button component to the canvas.
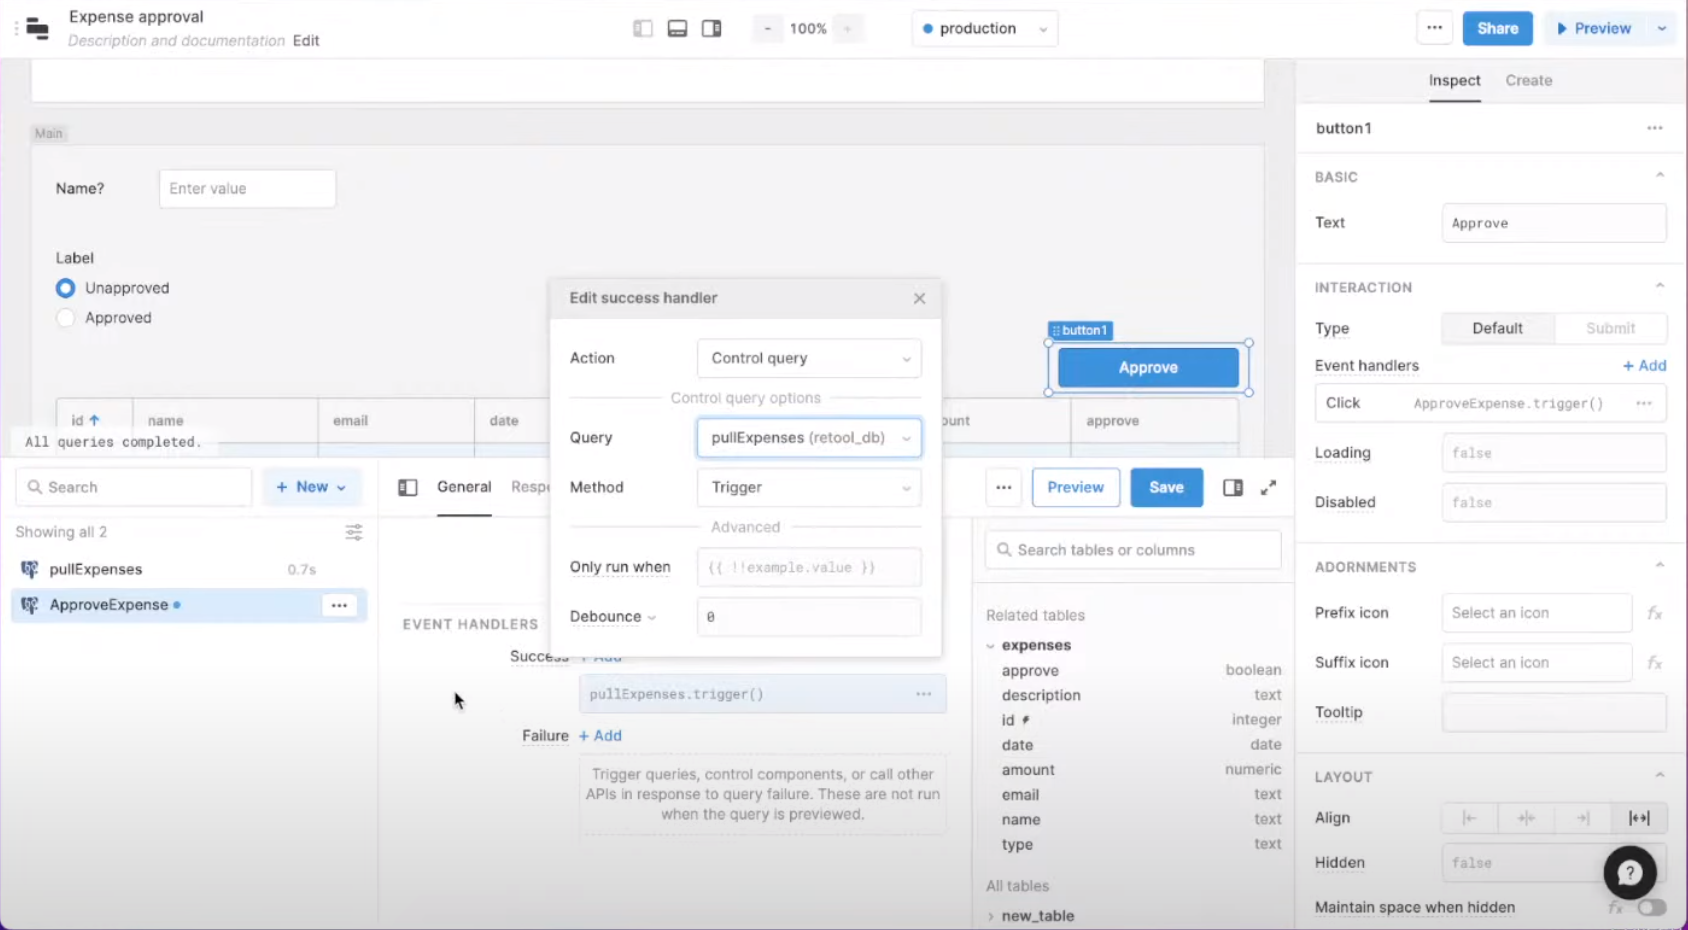
We then wrote a new query using GUI mode and connected the query to an event handler. We also made sure the data refreshed by adding a control query to pull our “expenses” data store.

Are you building internal tools? Let me know. Curious to hear how Retool or other nocode tools are helping you streamline business operations.
