Can I update my plan? Change my credit card? See my invoices? Wesley Chan teaches us how Stripe's customer portal can let users manage their own information.
Stripe has been launching features to make it easy to start accepting payments online. On past streams, we’ve discussed Stripe Payment Links. Stripe Engineer Wesley Chan (@wesleypchan) shows us how businesses can use the Customer Portal so that customers can self-manage account information. For example, the Customer Portal makes it easy for a client to update the credit card number on file, cancel a recurring subscription, access invoices, upgrade or downgrade a plan, and more.
In this stream, Wesley and I create a Customer Portal in Stripe and then connect it to Airtable, which serves as our customer relationship management (CRM) system. We then use webhooks and Airtable Automations to record when a customer changes a subscription via the Stripe Customer Portal. While many merchants can manage everything from within Stripe, this stream is for anyone who likes to create more advanced workflows and use Airtable automations to trigger follow-on actions.
The following services were used for this workflow:
Before the stream, two Stripe Payment links tied to individual products were configured to use in the workflow. If you are not familiar with Stripe Payment links, Stripe Product Manager Joshua Ackerman showed how to set up Stripe Payment links on a prior stream.

Tip: Each Stripe Payment Link should be tied to an individual product. The Customer Portal can manage multiple Payment Links.
An Airtable base was also configured and some Airtable automations built before the stream started.
We do use webhooks in this stream. Think of webhooks as calling a phone number. (Thanks to CJ Avila of Stripe for the analogy. Learn more about webhooks in my All about Airtable Automation webhooks stream.)
Go to Settings > Billing to access the Customer Portal.
You’ll receive a link that you can then share with anyone looking to update their account information. The link can be shared on a website, social media, help desk articles, emails, etc.
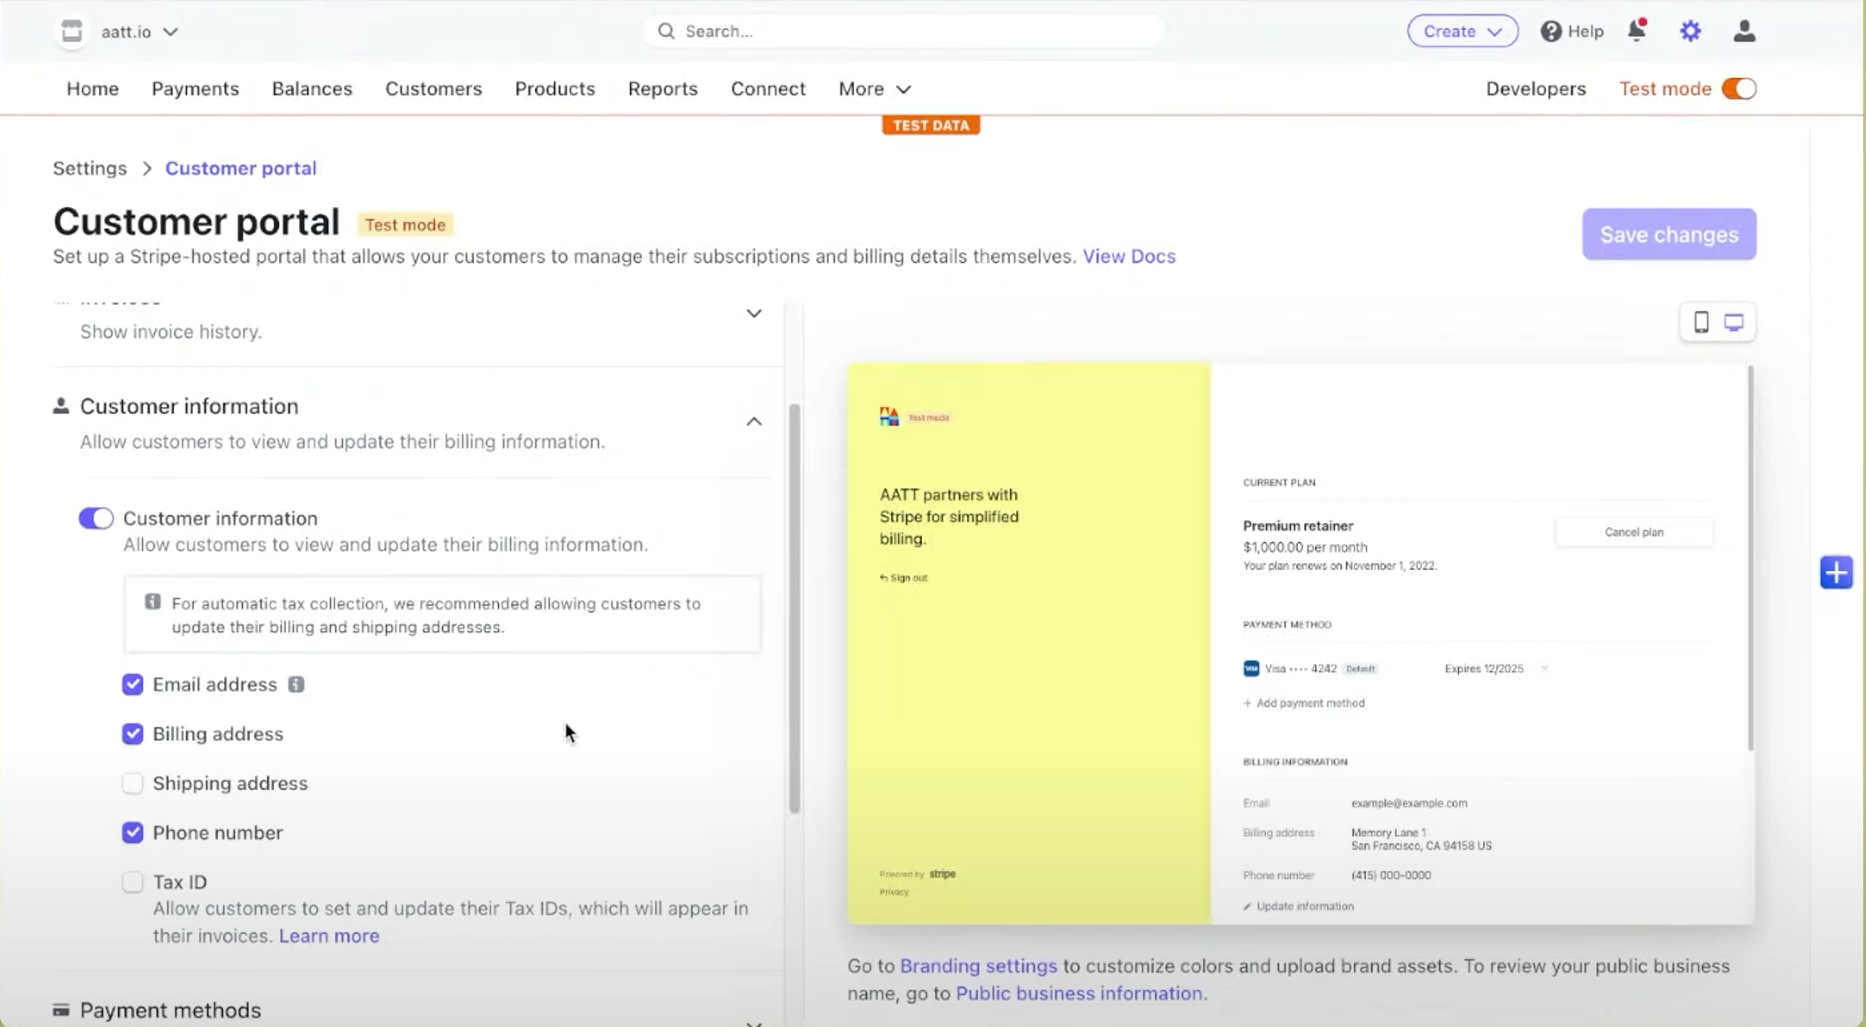
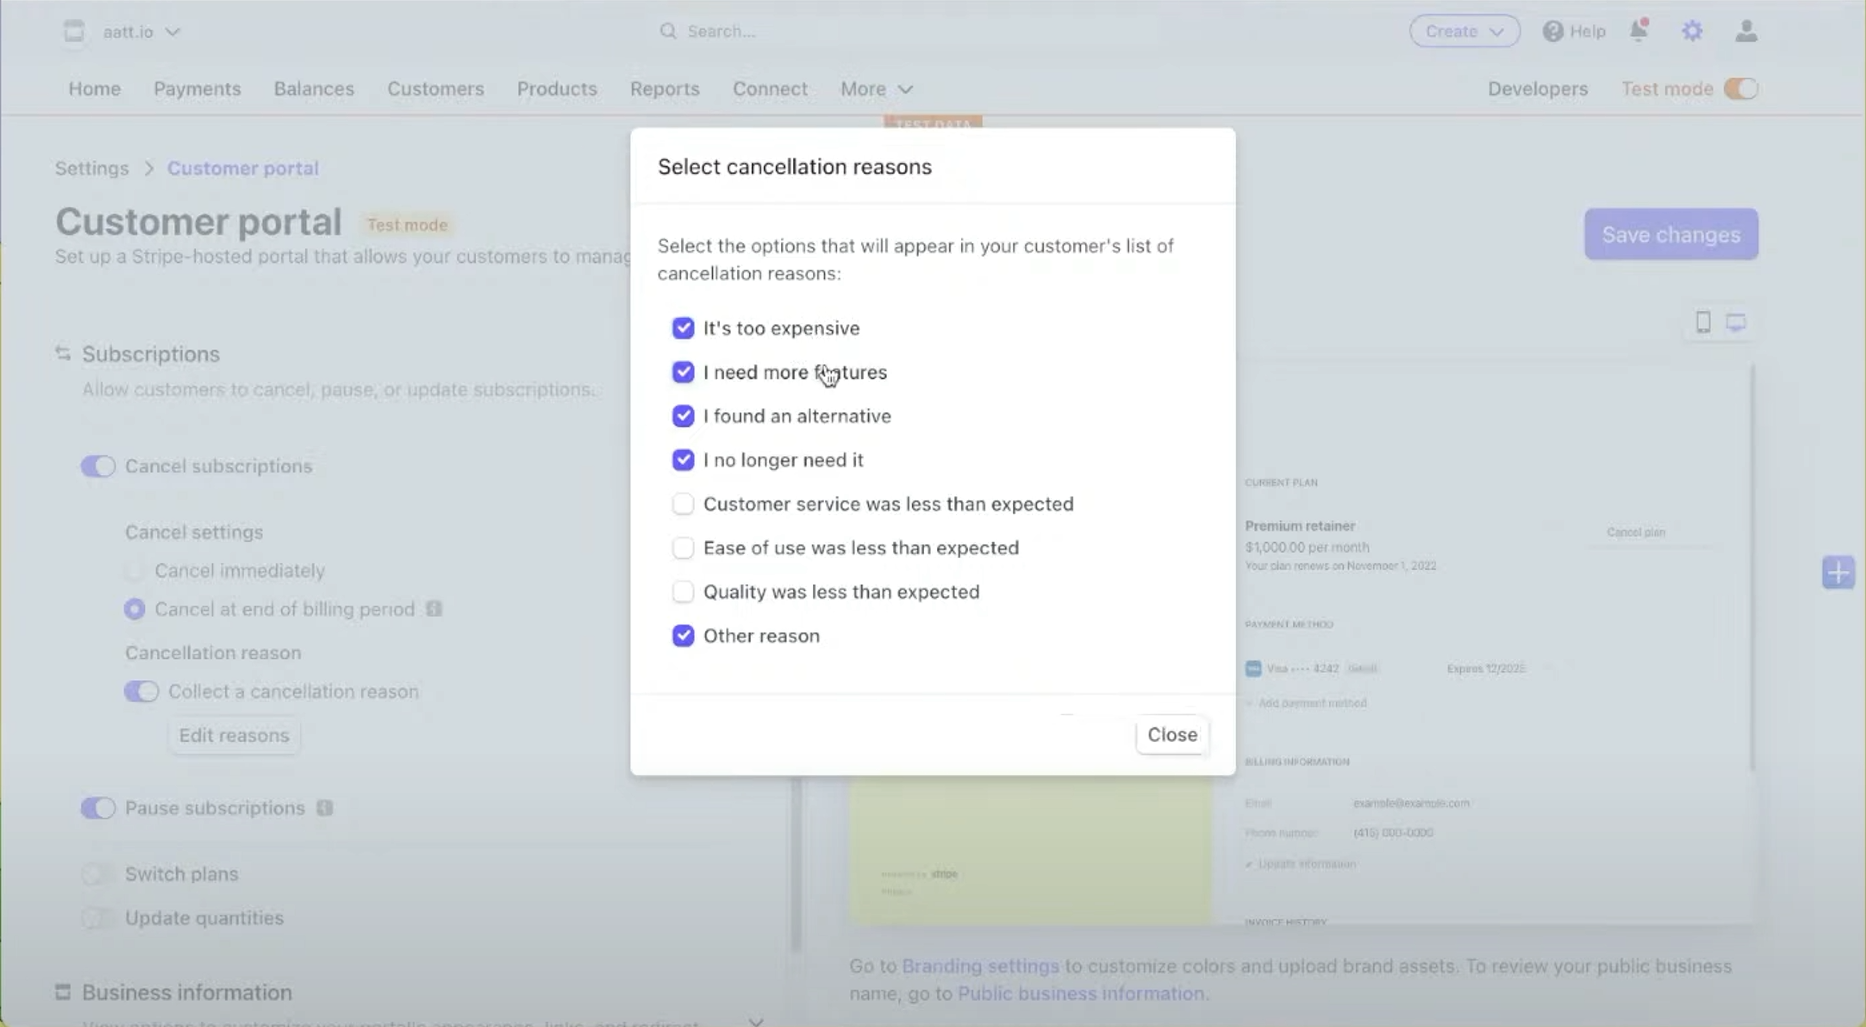
Depending on your business needs, a number of customization options are available from accessing invoice history, to updating customer information, to payment methods, subscriptions, etc. It’s also possible to configure the Customer Portal to match a business’ branding.
After configuring the Customer Portal, Wesley walked us through how to view it from the perspective of an actual customer while in Test mode. This makes it easy to ensure that all the settings are correct.
Before the stream, an Airtable base was created. Throughout the stream, we updated it.
Subscriptions Table
Customers Table
We also configured a webhook that triggers an Airtable automation that creates a record in our Customers table.
To update the Airtable CRM when a change occurs, we need to have an Airtable automation listen to Stripe.
Creating a “When webhook received” automation in Airtable creates a webhook. This will then be added as an endpoint in Stripe by going to Developers > Webhooks and selecting “Add endpoint.” We then selected “customer.subscription.updated” as the Stripe event that causes data to be sent to the webhook we created in Airtable.
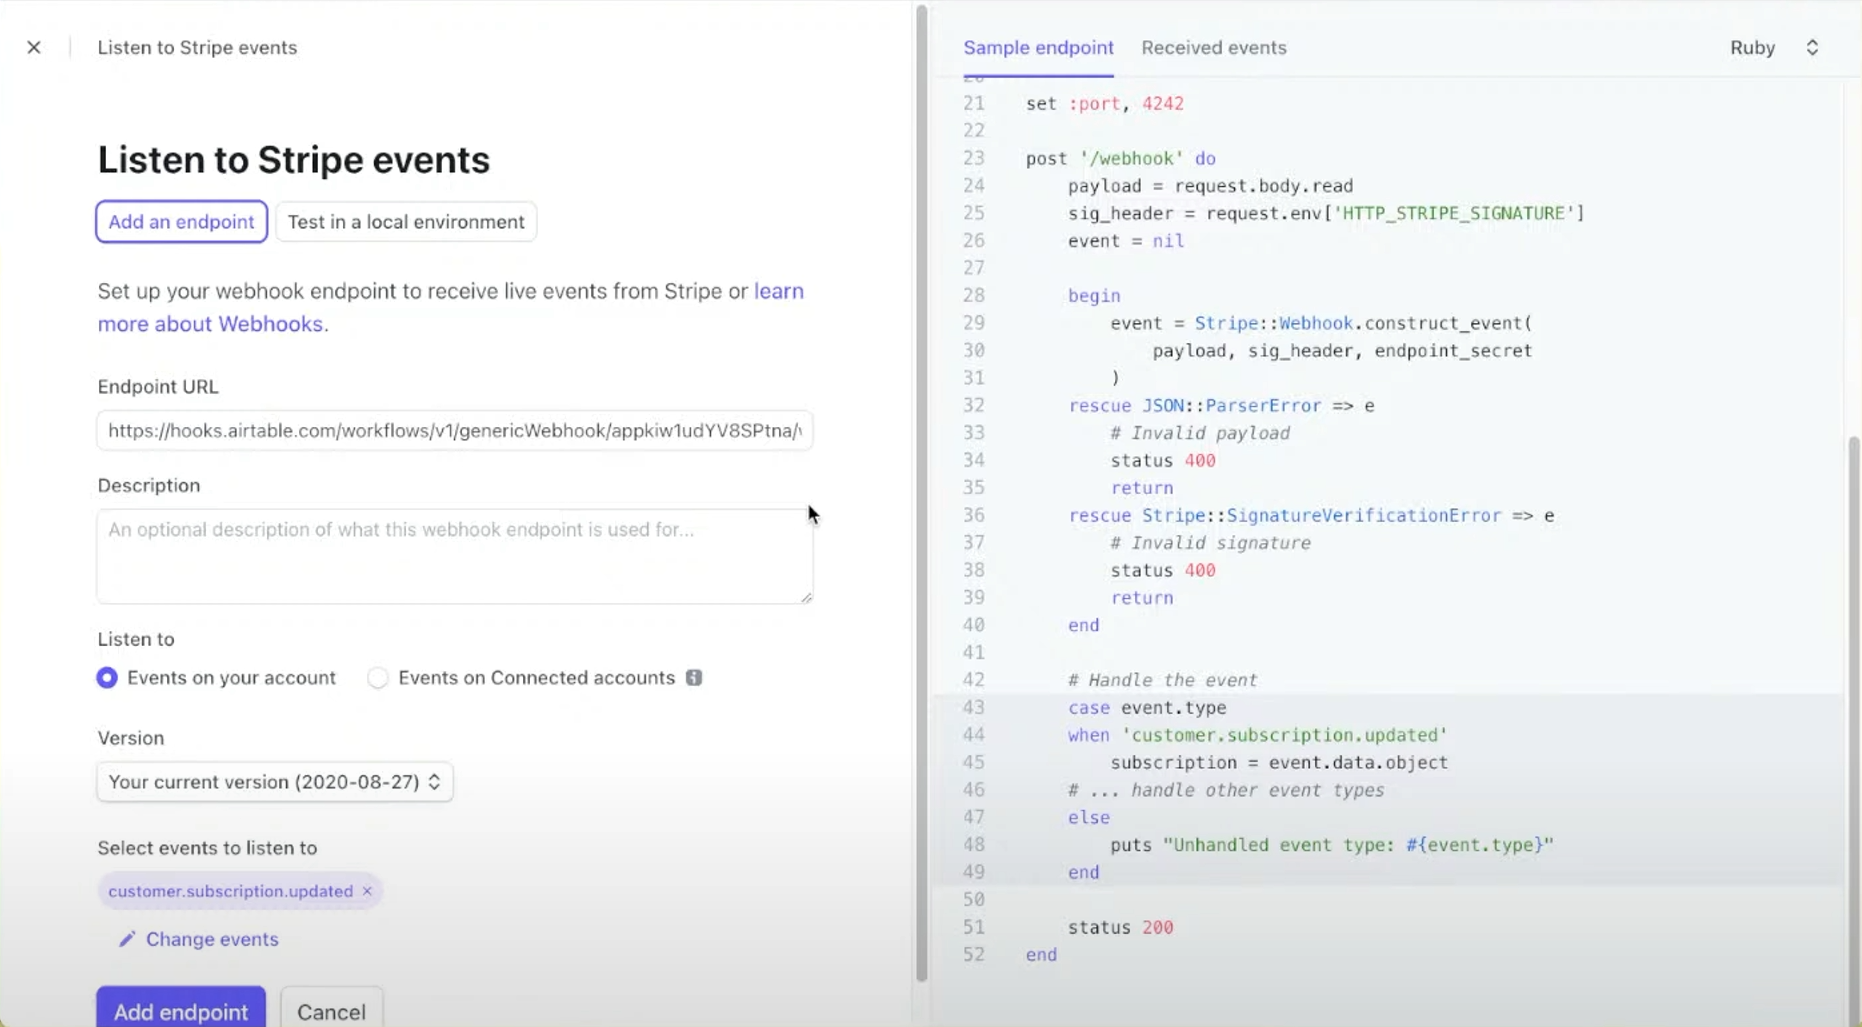
NOTE: You will need to configure a different webhook for each event that you may want to track.
We then went through a process of simulating a plan change so that there would be data available to continue building our Airtable Automation.
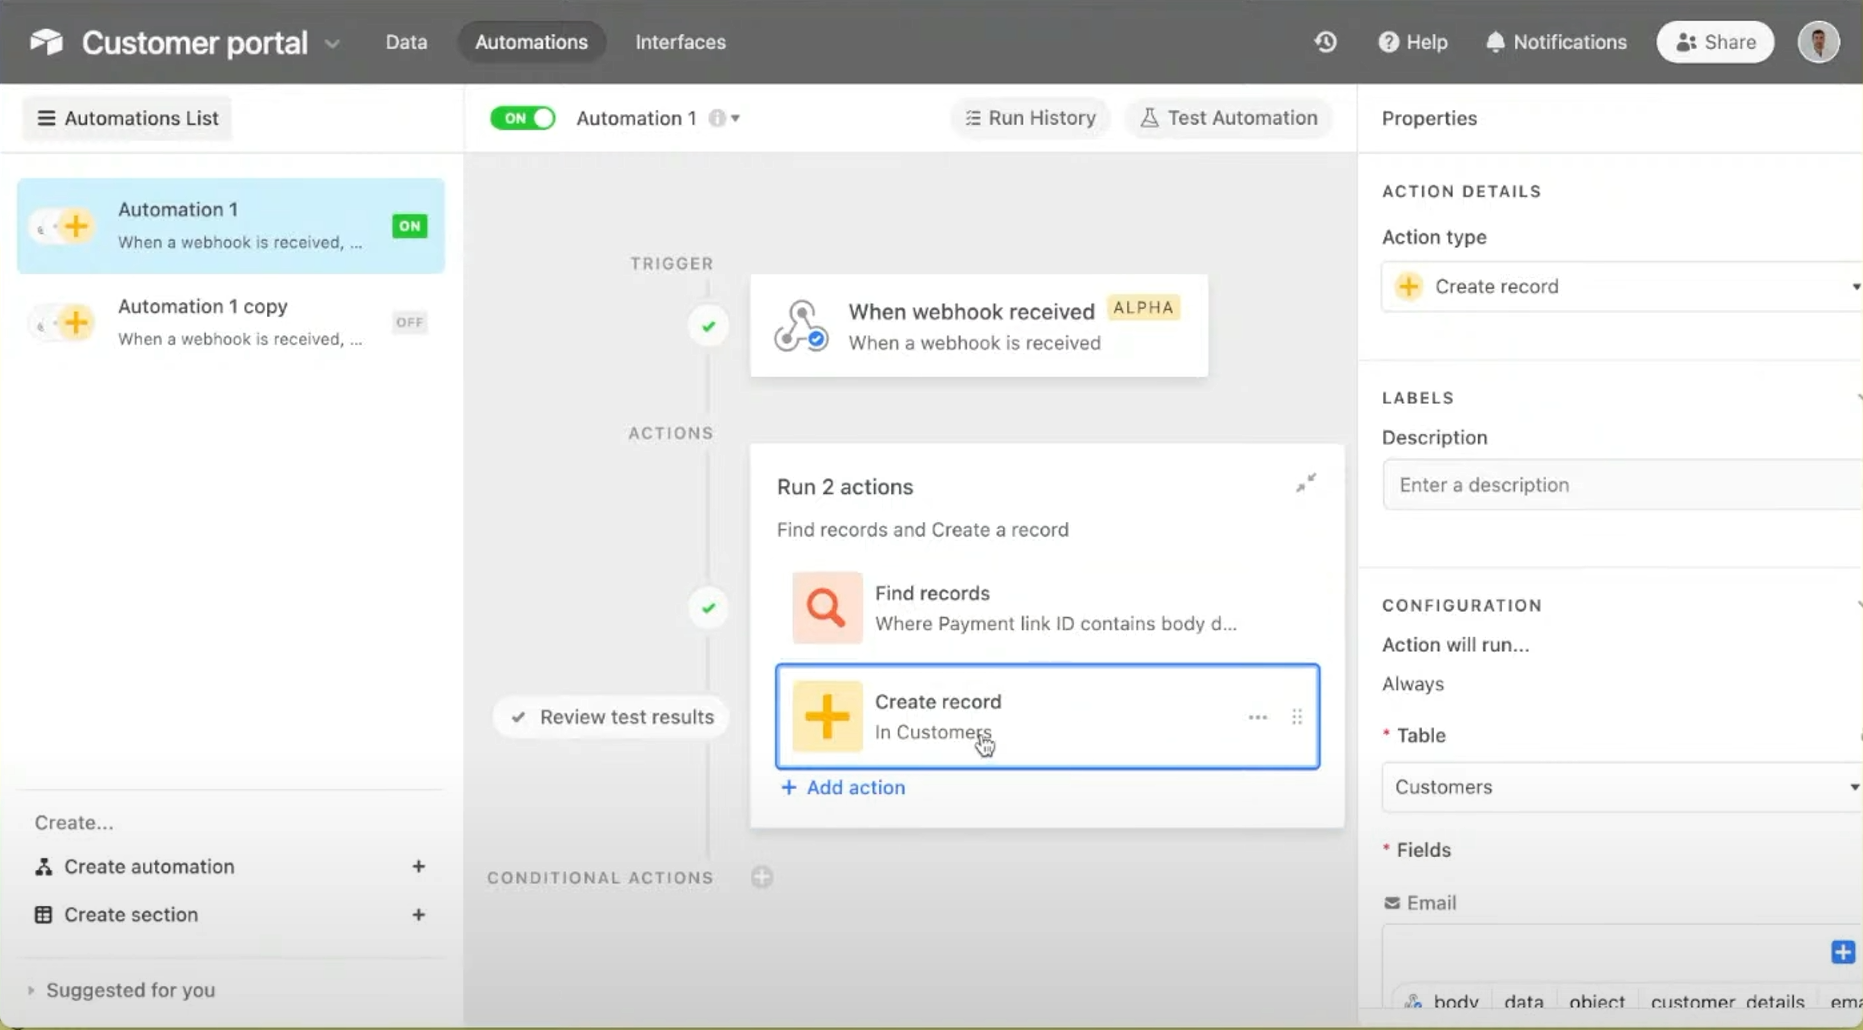
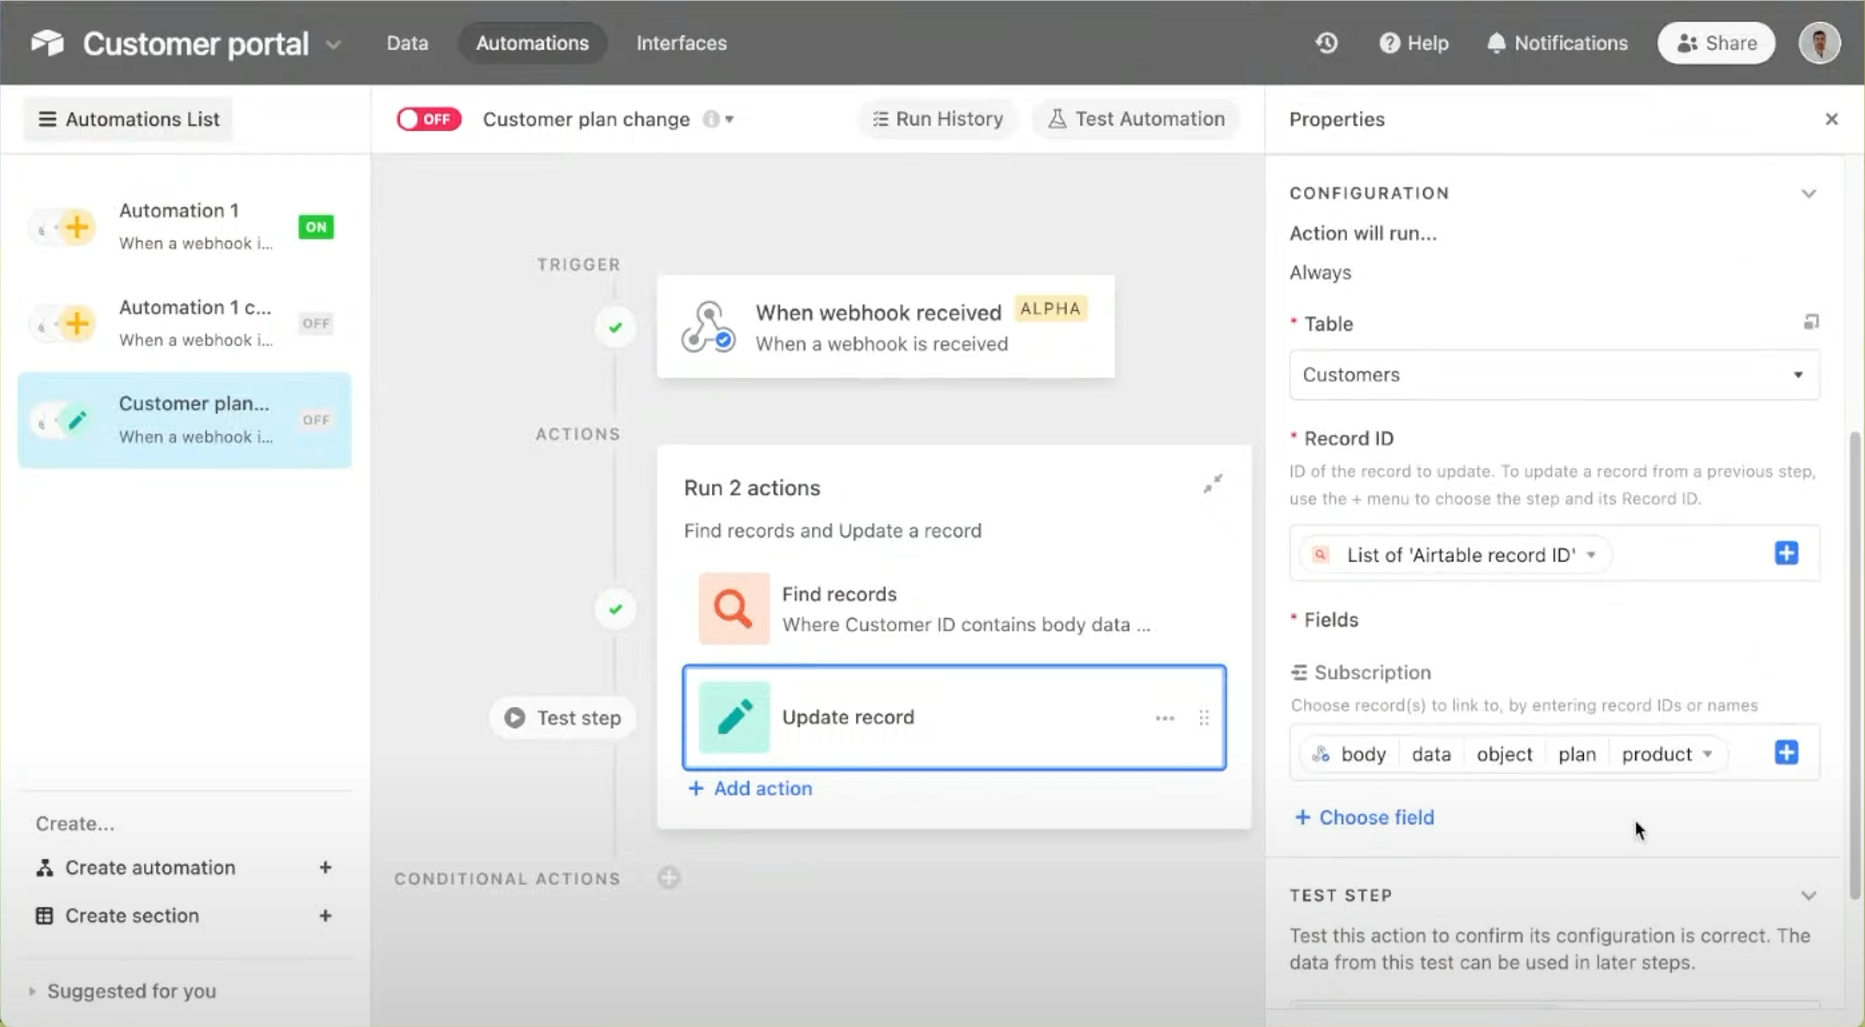
Our Airtable Automation involves finding the record to be updated by searching the Customers’ table for a record where the “Customer ID” field contains a value that matches the “Customer ID” received via the webhook.
After finding the record to be updated, the next step in the Airtable Automation is to update the record with the new plan information.
Repeat these steps for any other actions you wish to track in your newly created Airtable CRM. You can further extend this workflow by adding additional automations to send you an email or text message. For example, you may wish to send a personal "thank you" note when a customer upgrades to a higher priced plan or reach out to find out why a customer is canceling.
Do you use Stripe Payment Links or Customer Portal to run your business? Let me know! I would love to hear how these nocode tools help you build and grow your business.


