Finding in apartment in NYC was rough. We only had 2 weeks to find a place. Listings on StreetEasy close in 36 hours in NYC. It was paramount to see new listings, contact the broker, visit, customize our application paper for the listings and apply quickly (like real real fast). With so many listings I needed a place to track each listing's details and where it is in my pipeline to optimize my search.
Step 1: Table with all of my listings (and their details)
The first step was to create a table where each record was a listing. The fields were the key details we wanted to track for each listing: StreetEasy URL, price, status in my pipeline, summary notes, images, rating, visit details.

For the status field, we landed on three options: empty for those we're unsure about, contacted for those we hope to visit, process for those we've applied and rejected for where we were refused (which happened a lot)!
Scribe walkthrough: how to add fields to Airtable
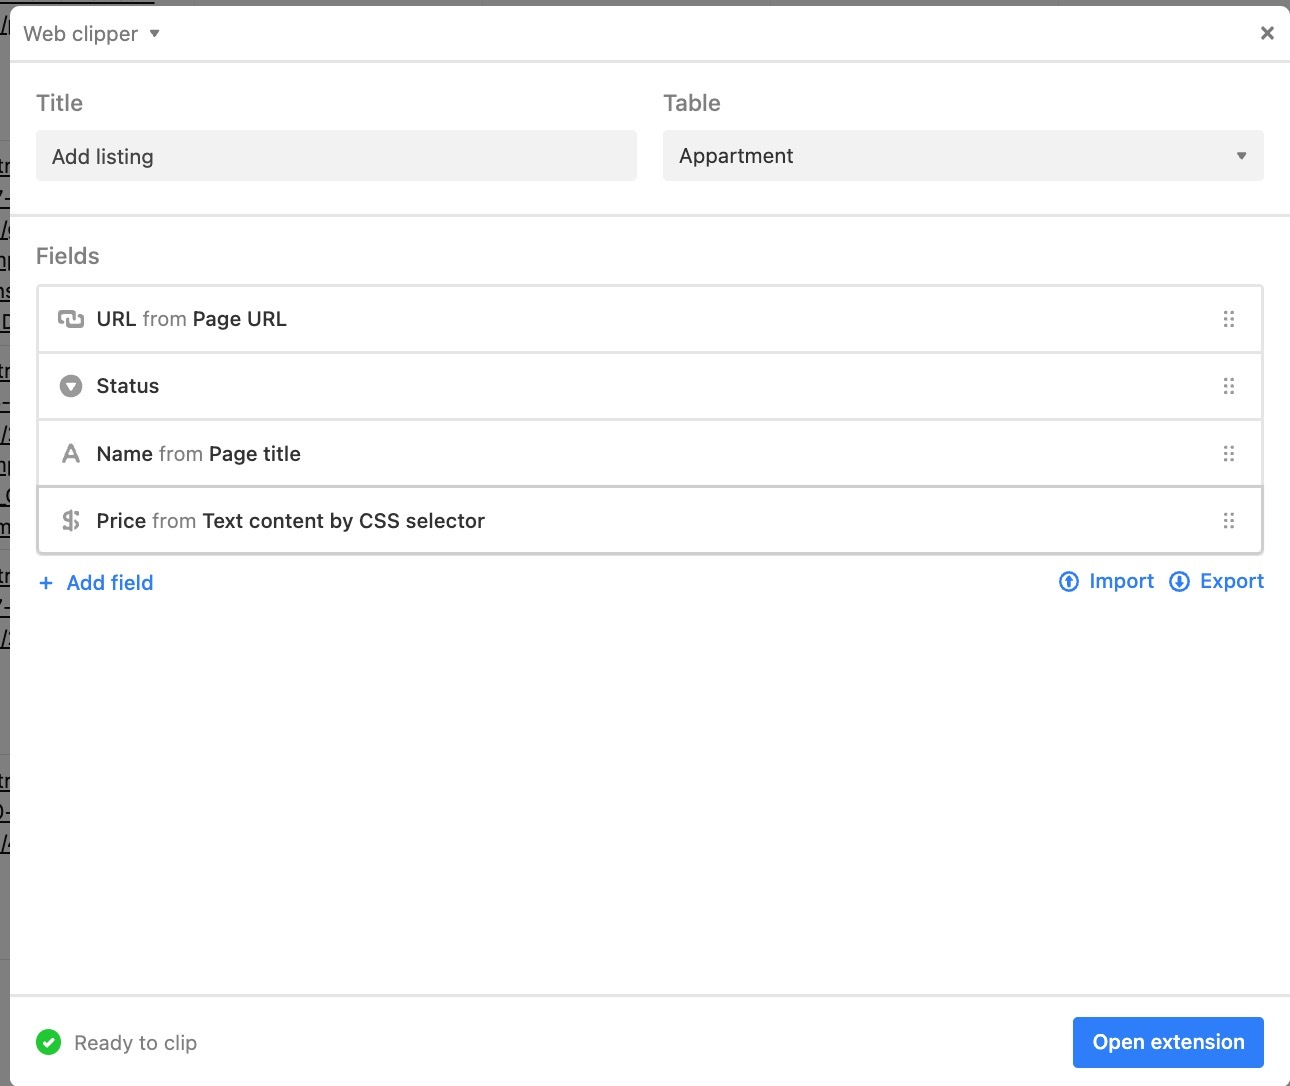
Step 2: Easily add listings with the Web clipper app
All rental listing in NYC live on StreetEasy.com. I needed an easy way to get listings from StreetEasy into Airtable so my partner and I can track the process and make decisions. To do that, I turned to the Web Clipper app which lets you take information from any web page and easily add it as a new record into any table.
I configured it to automatically get a listing's URL, price and address.
With this Web Clipper app setup, I added all of the listings I liked from StreetEasy to Airtable without context switching.
Scribe walkthrough: How to add Web Clipper to your base
Step 3: Create views for your pipeline and visits
We were searching in a very tight market (as everyone kept telling us). The number of listings still felt overwhelming for us to track in our heads. So I created two key views. First, a Kanban view to track where we were with each listing in our pipeline.

And a calendar view of the different visits we had scheduled which I would sync to my Google calendar to make sure I didn't miss any of them. A few still fell through the cracks unfortunately mostly due to me taking the wrong subway line and missing my appointment.

Scribe walkthrough: Create a new view in a table
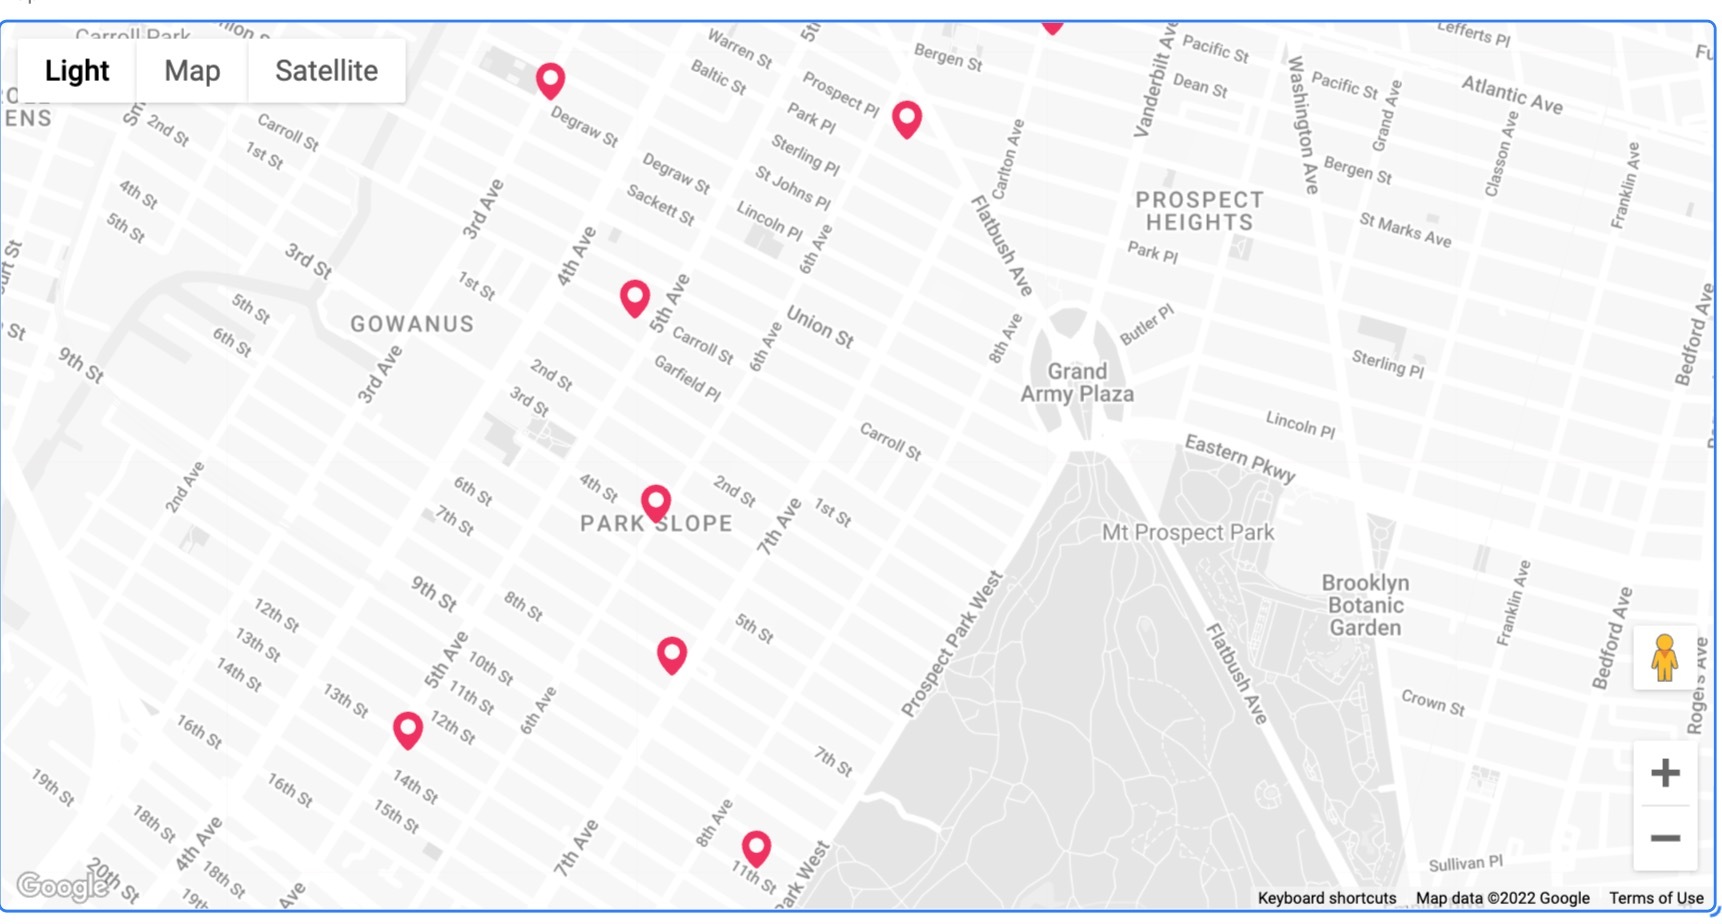
Step 4: Create a map "view"
We're new to NYC so it was difficult for us to understand where listings were located. The map on StreetEasy was confusing as it included all listings, not only those we wanted. So I turned to Airtable's Map app to place every listing where we had a visit on a map! It gave me a sense of the neighborhood and how far listings were from each other.
Scribe walkthrough: Add the Map app to your base
If you want the whole base, can get it here and play around with it :)
I'm glad to share that we did finally find a place! We're slowly getting settled in. I'm excited to get back to my regular schedule and appreciate y'all sticking through with me!
Let me know what you think for this new format. If you have a workflow you want to share, let me know by replying to this email.
Until next week, keep building!
Aron


